Beginners Artisan Sourdough Bread Recipe
Make your own delicious bakery quality artisan sourdough breads at home. This recipe is a good start for new sourdough bakers. It's a long process but an easy one. These breads are so worth it!
Ingredients
For the Dough:
- 525 grams water-80 degree F. -NO chlorine, 2.22 Cups
- 20 grams salt OR 1 Tablespoon MAX. (different salts might weigh out differently. They will also have different volumes so don't go overboard.)
- 200 grams Very active starter - make sure it floats , 1 + Cup
- 700 grams All purpose Flour (or bread flour), 5 1/2 Cups
Instructions
MAKE THE STARTER:
- Make the STARTER AHEAD
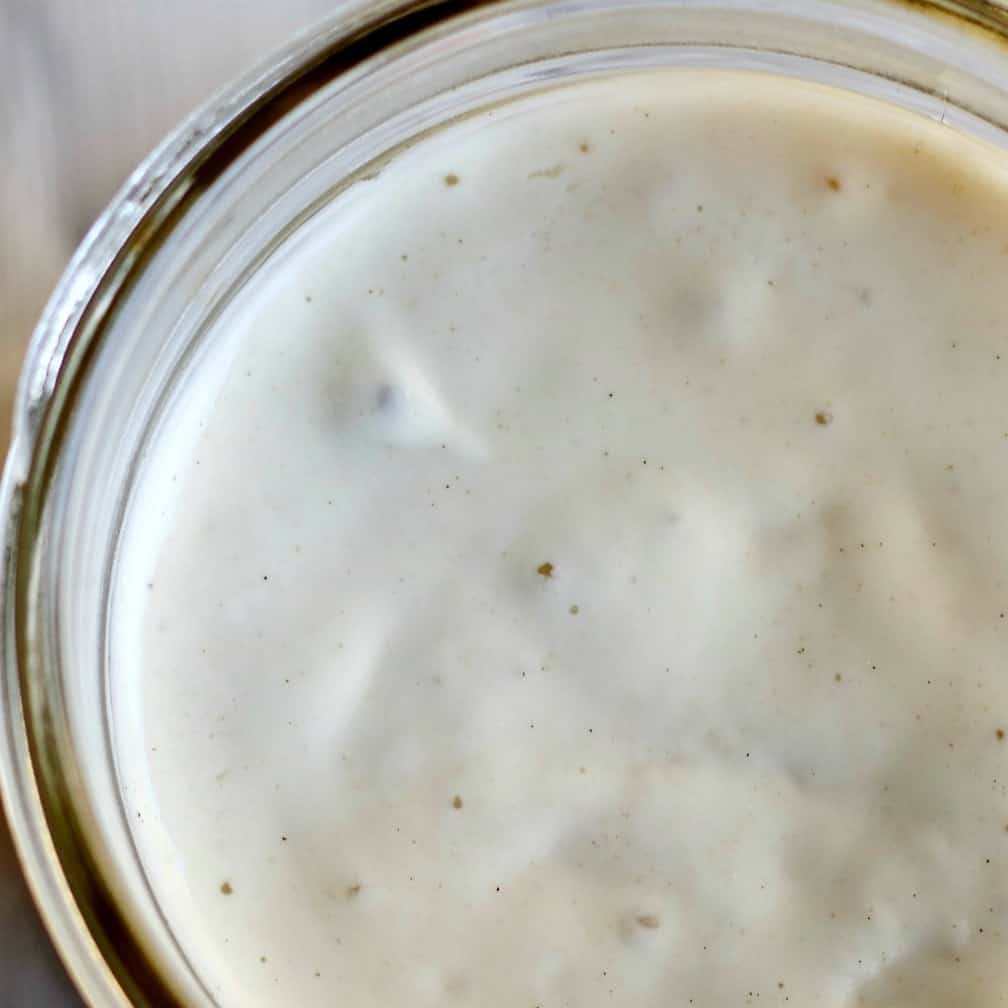 (This can take up to a week or more) AND DO NOT USE UNTIL IT IS ACTIVE ENOUGH TO FLOAT A TEASPOON ON A CUP OF WATER.
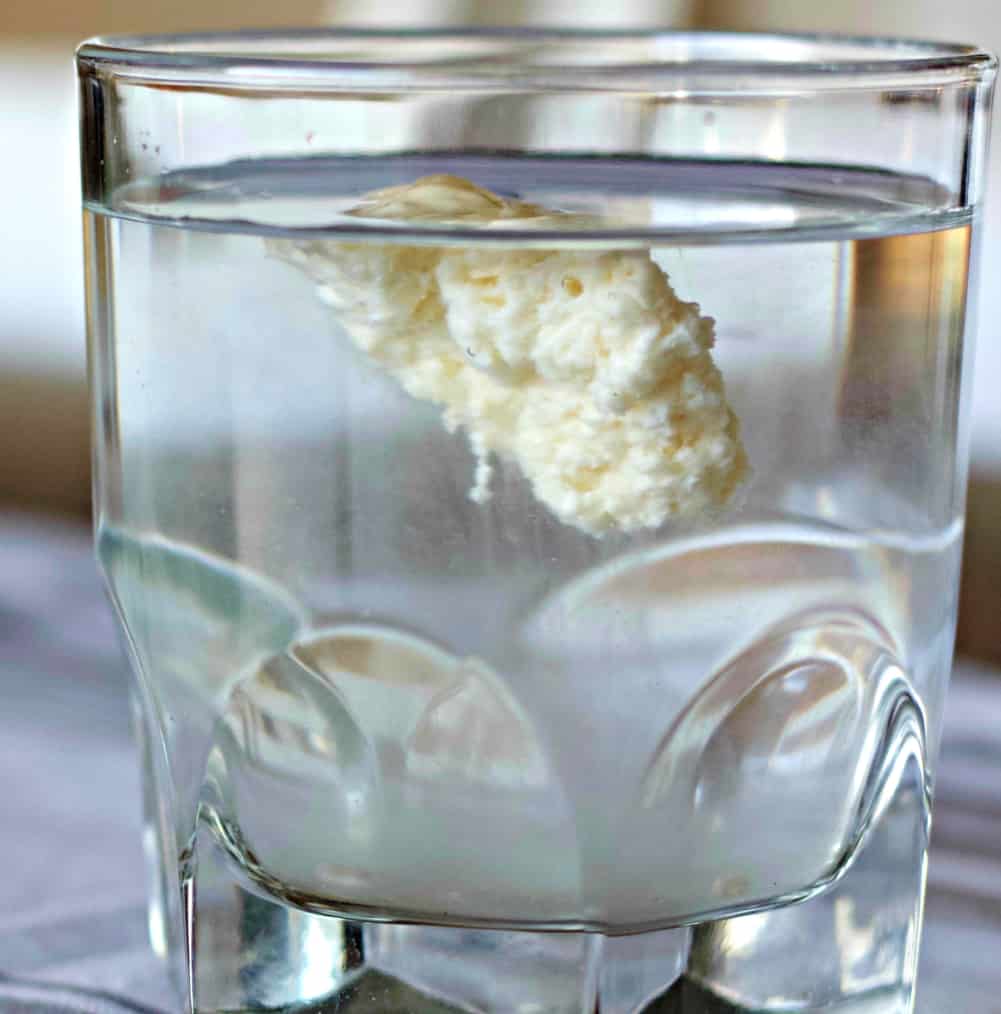
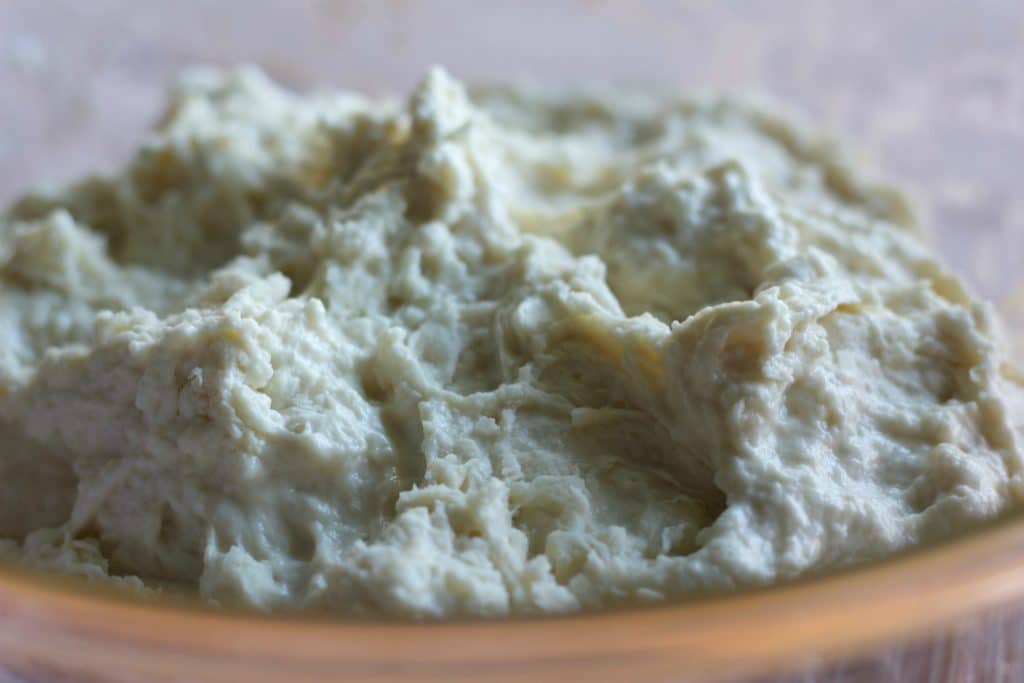
Prep the Starter For Baking:
- This process balances your starter for best rise. Feed 100 grams starter with 100 grams flour and 100 grams warm water.
- Let sit overnight.
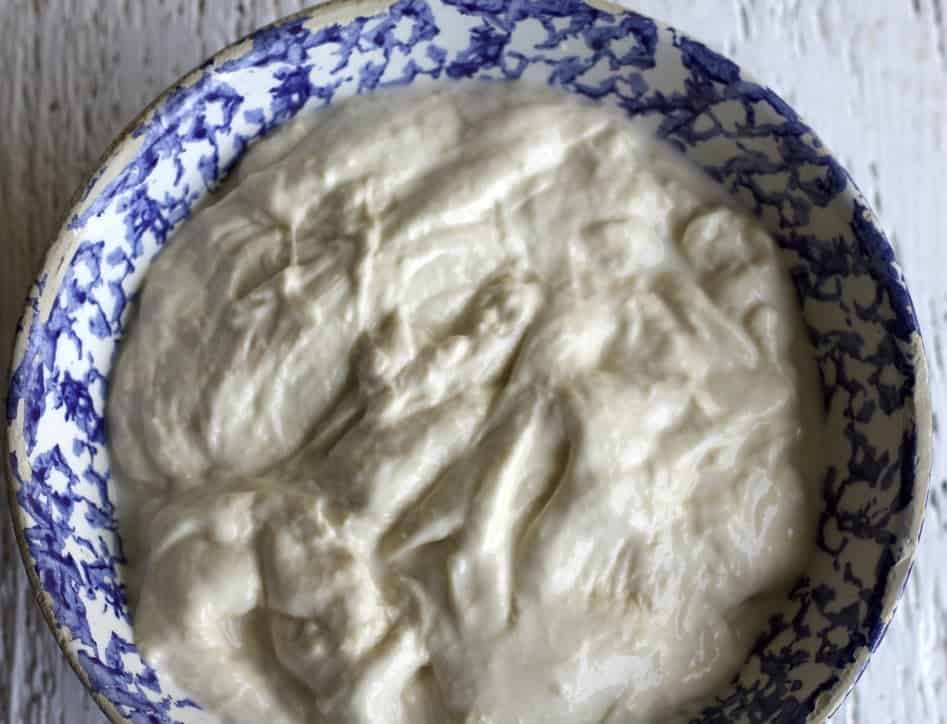
- It should pass the float test in 8 to 12 hours.
- If it does not repeat feeding.
MIX THE DOUGH:
- Pour the water into a large bowl.
- Add the ripe balanced starter to the water and mix thoroughly with a whisk or by hand until the floating cloud of starter is mixed completely into the water.
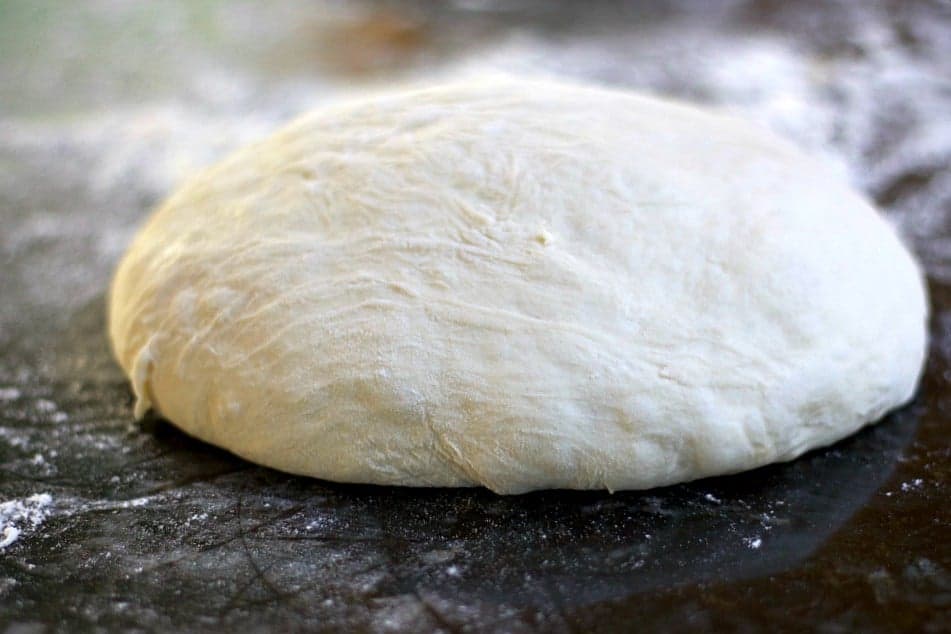
- Add the flour to the leavened water and mix with the dough bowl scraper or other spatula. At the end use wet hands to form a shaggy dough ball.
AUTOLYSE:
- Let it rest (autolyse stage) about an hour. This stage can be extended without worry up to four hours.
- After autolyse, add the salt to the bread dough. Use your hands to pinch and stretch the dough gently until the salt is mixed into the dough.
Stretch and Fold:
- Using your wet hands pull the dough from under the dough ball up and stretch it gently as you pull it over the dough ball top. Release. Repeat this process as you give the bowl quarter turns until the dough is stretched and pulled from each quarter of the bowl.
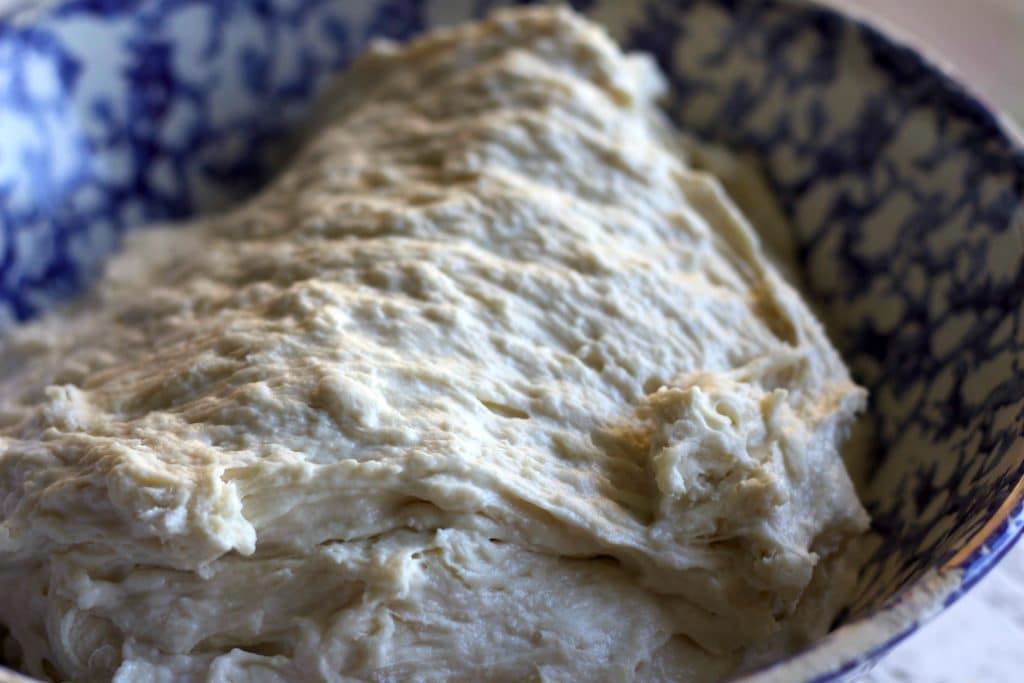
- Over the next 2 1/2 hours repeat the stretch and fold every 30 minutes for a total of FOUR times. The dough will change from a slimy ropy mass to a billowy dough with many air pockets and definite body as you stretch and fold it. DO NOT PUNCH DOWN THE DOUGH AT ANY TIME. Those air bubbles create the excellent crumb and flavor.
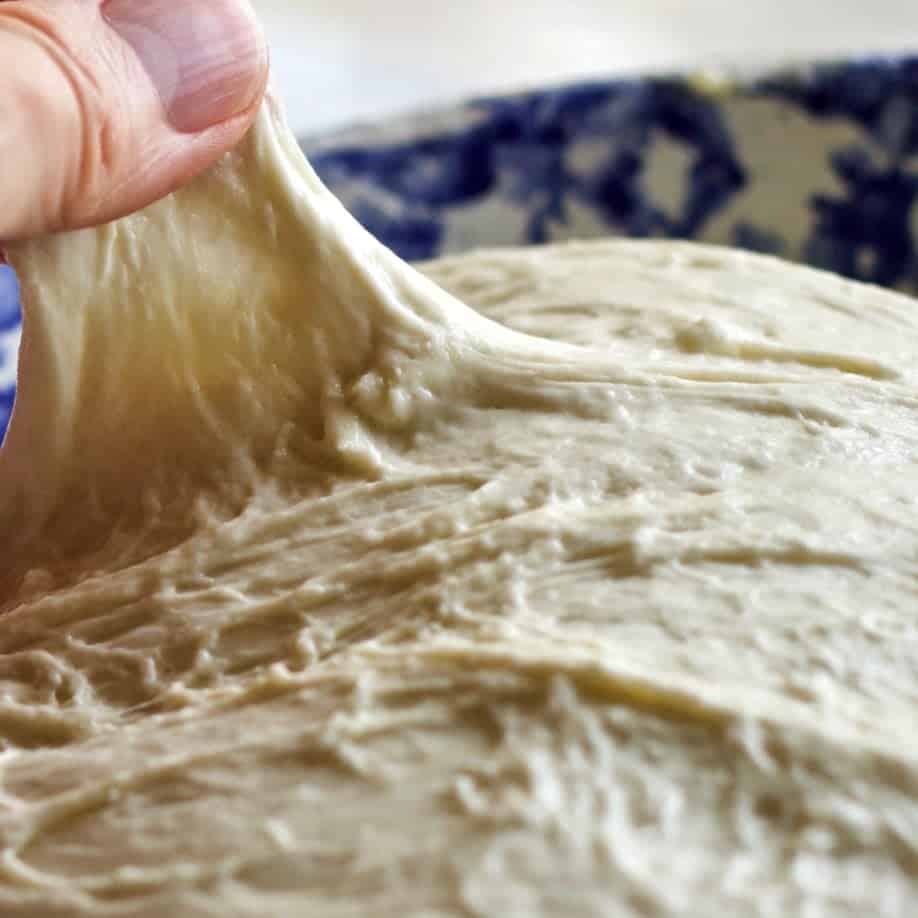
- The dough should become an elastic resilient dough that passes the window pane test. IF your dough is still breaking before it goes transparent when pulled. Do ANOTHER stretch and fold.
BULK RISE:
- Allow the dough to bulk rise IN THE BOWL at room temperature an hour or SO until it rises by 30 percent or so.
- Cover the bowl of dough with a plastic bag and set it in the fridge for 12 to 15 hours (Or overnight). It should continue to rise slowly so give it room in the bowl.
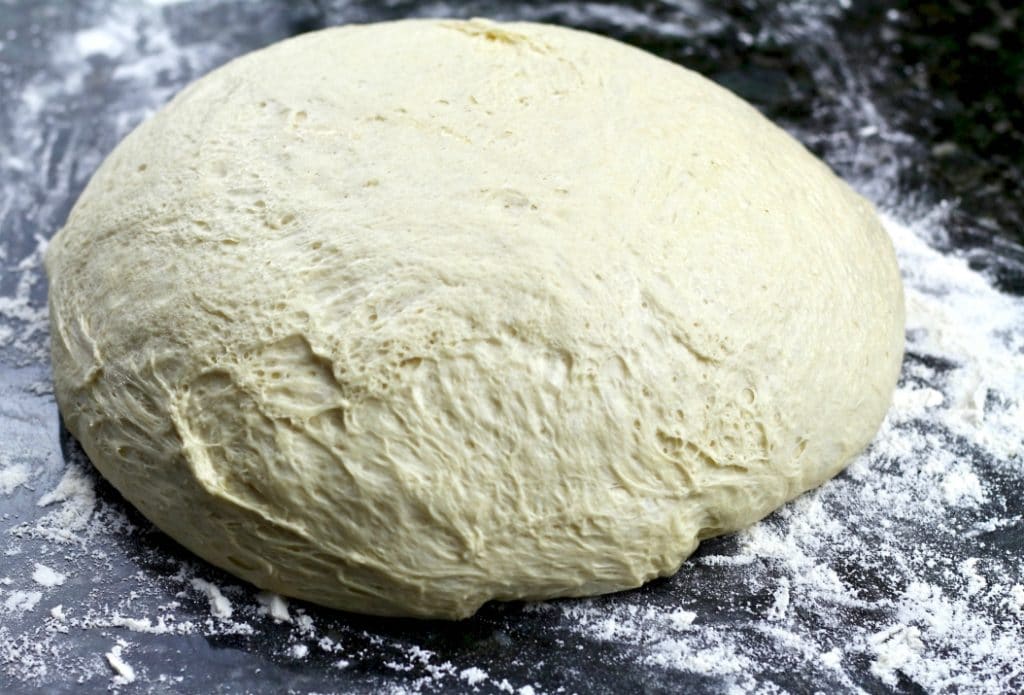
- Remove the dough from the fridge and let it sit on the counter in the bowl for two hours or until the dough reaches room temperature (or pretty close). The dough will soften and gently rise (a tiny bit) as it warms.
DIVIDE AND BENCH REST THE DOUGH:
- On a clean unfloured counter pour out the dough into a large mass. Flour the top of the dough lightly but evenly.
- BEING CAREFUL NOT TO OVERWORK THE DOUGH-Form each half into a dough ball. The most efficient way to do this is to use the counter as your pivot point. Scrape in a circle around the dough (leave it unturned, flour side up). The unfloured counter will hold the dough center and create tension as you circle the dough with the scraper forming a ball. Repeat to form two dough balls. The DOUGH edge should be round and the dough ball should have some form and resilience to it.
- Let the dough balls rest for 20 to 30 minutes. They will spread out but should not fall off at the edge of the pancake. If they do, reform the loaves and bench rest them again to build the structure of the dough better.
FINAL SHAPE AND RISE:
- Gently slide the dough scraper under one of your dough balls and flip it over so it rests on the floured side.
- Now gently stretch and pull the dough over from the bottom to 1/3 up the loaf. Stretch and pull the dough from the sides to the dough middle. For the final stretch take the dough from the top of the ball and pull it all the way down to the bottom. Form a seam. Pinching the seam as necessary. (view the video for help here)
- Place the dough seam side up in your rice floured, cloth lined banneton or bowl.
- Rise in the fridge 2 to four hours.
Baking Instructions:
- Set a baking stone (if you have one) on your oven bottom rack. Set your dutch oven with it's lid on next rack up (lower third of oven). PREHEAT oven to 450 degrees F. for at least 30 minutes.
- Keep the formed loaf in your banneton in the fridge until you actually need to place it in your preheated dutch oven. Cold dough will aide the oven spring.
- Remove one banneton from the fridge. Place the dough in your preheated dutch oven. I do this by flipping it into the dutch oven as gently as possible seam side down.
- Alternate method: Place high heat safe parchment paper over the banneton. Turn the banneton upside down so the dough falls gently onto the parchment paper.
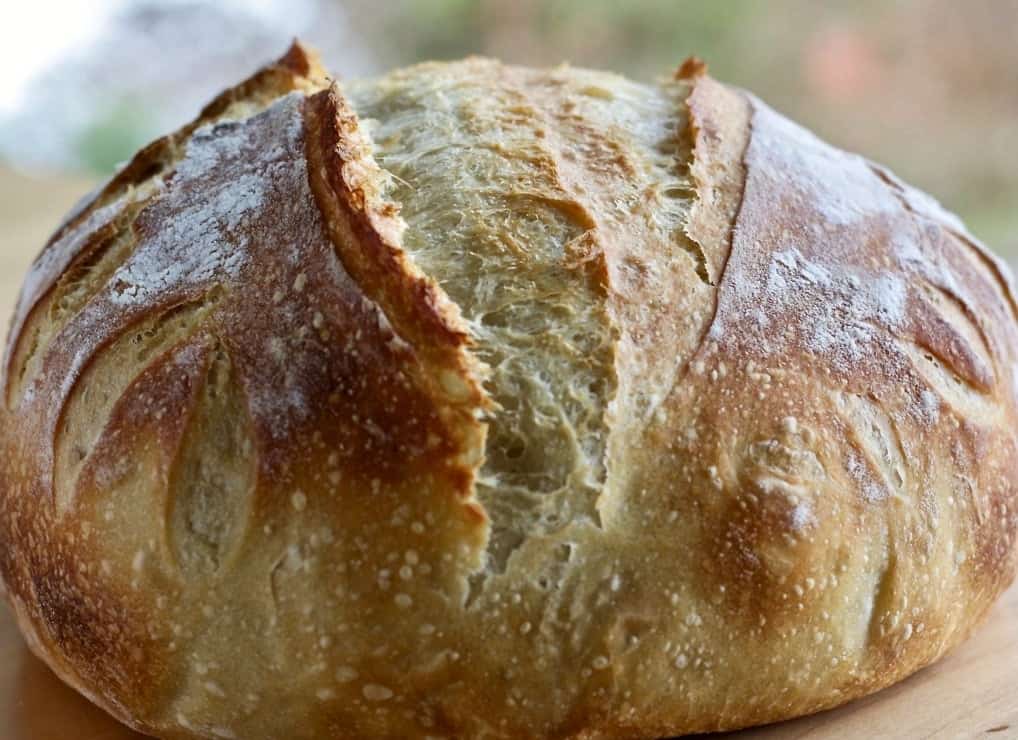
- Score the loaf with your lame knife or a razor blade or sharp scissors. Scoring helps the dough rise better.
- Now pick up the scored loaf with the edges of the parchment paper, if using, and gently and carefully place it into your VERY hot dutch oven.
- Put the lid on the dutch oven and return it covered to your preheated oven.
- Bake 30 minutes at 450 degrees.
- Now REMOVE the lid (and parchment paper if using). Steam should come out. Hopefully the bread is a light golden color with a nice rise and set crust. Bake an additional 10 minutes UNCOVERED or until the loaf thumps hollowly and the surface gets dark(Caramelized darker than you are used to maybe) and the scored areas look shiny. (To prevent over browning turn the parchment paper (or foil) upside down over the loaf as it finishes in the oven.)
- Remove the dutch oven. Place the finished loaf on a cooling rack. Do NOT cut it for at least an hour to set the crumb.
- Return the dutch oven (with lid on) to the oven at 450 degrees F and preheat for 15 minutes. Repeat the process with the remaining loaf.
- To tell if your bread is properly done. Use your digital thermometer and insert it into the center of the loaf. It should read about 205 degrees.
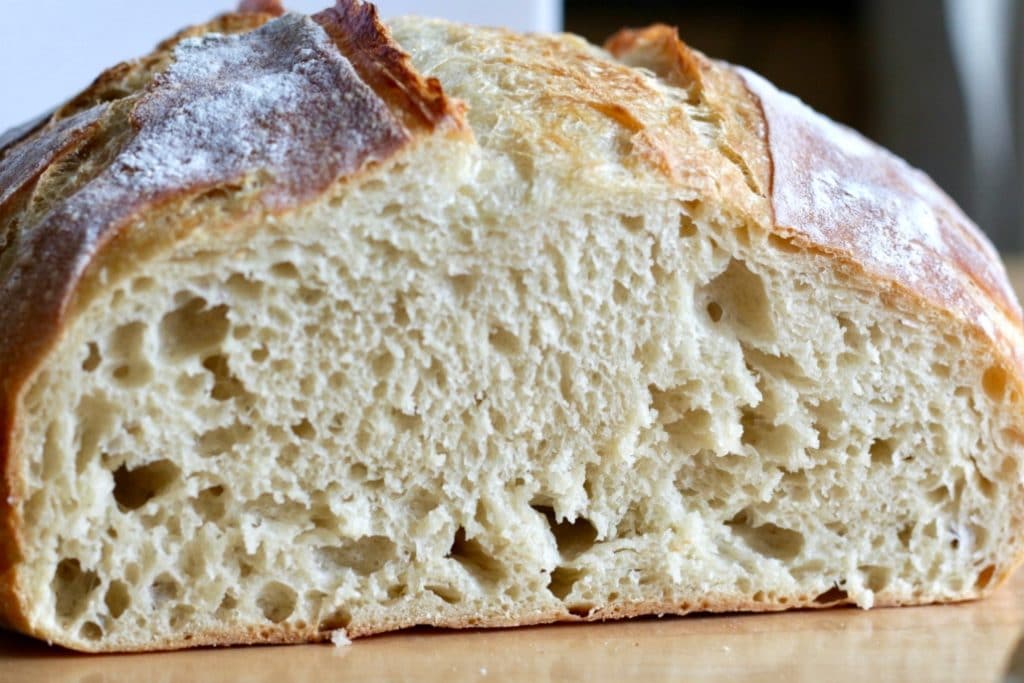
- Other TELLS: Look at the crust and LISTEN to it cool. The crust should be 'shattery' which means as it cools it will crack. You can see it and hear it. This is bread music :) also a dull sounding bread is probably not completely baked. When you cut the loaf is should have a creamy but springy crumb with lots of aration.
Notes
TIPS:
- WATCH your dough as it goes through the stages of fermentation. This dough can easily over ferment at high room (Or oven proofing) temperatures. If your dough gets slack, unworkable and won't form or rise it is probably over fermented. At this point I suggest you Make pizza with it instead of loaf bread :)
- To avoid over fermentation keep the room temperature (or oven) at 80 degrees or less. Whatever flour you are using will influence this process. Learn to work with the dough you are creating.
Freezing:
- This bread freezes VERY well. After it is completely cooled double wrap it tightly with plastic wrap and set in the freezer. I have done this several times. Defrost at room temperature wrapped or unwrapped. Slice and eat.
Storing the loaves:
- For best results store your sourdough bread loaves in a bread box (I use my dutch oven with the lid slightly cocked). That beautiful crunchy Sourdough crust gets soft in an airtight container or plastic sack. Once cut just set the bread cut side down to protect the crumb. These loaves hold very well for at least three days. Freeze the other finished loaf if you can't eat it right away.
Banneton Tips:
I am using my ceramic round bowls lined with linen dish cloths for my bannetons. The high hydration doughs like these tend TO STICK to those cloths. To help with I scrub rice flour into the cloth. And leave an extra bit of it in the banneton bottom. Once the dough is in the banneton I add a bit more rice around the side of the loaf to keep it from sticking during the rise.
IF your dough sticks a bit to the banneton cloth, use a sharp knife to pull it away and add some rice flour to the sticking spot. Now it should invert without too much trouble. For really tough sticks, cut the dough away and repair it carefully by pressing it to reshape it before baking. Careful of burns if you are doing this in a hot pot.
Baking sourdough hearth breads in bread pans:
- If you have a large dutch oven bake one loaf at a time in it. Follow the directions in the recipe card.
- If you cannot fit the bread pans into your dutch oven place them on a cookie sheet.
- You will also need a lower heat. Preheat to 400 degrees F. for 15 minutes. Reduce heat to 375 and bake another 30 to 40 minutes.
- On the shelf below the pans fill a pan with water (like a roasting pan) for steam.
- Spray your unbaked loaves liberally with water before setting them in your hot oven.
- follow the recipe instructions. Do the thump test to make sure they are done.
Nutrition Information
Yield
24Serving Size
1 sliceAmount Per Serving Calories 104Total Fat 0gSaturated Fat 0gTrans Fat 0gUnsaturated Fat 0gCholesterol 0mgSodium 324mgCarbohydrates 22gFiber 1gSugar 0gProtein 3g