How to Shape Sourdough Bread (Build Tension for Better Oven Spring and Crumb)
As an Amazon Associate and member of other affiliate programs we earn a small commission from qualifying purchases through our affiliate link. For more information read our Entire Affiliate Disclosure.
Learning how to shape sourdough bread is one of the fastest ways to improve your results as a home baker. If your loaves are spreading, baking flat, or your scoring isn’t opening cleanly, the issue is often not your starter or your recipe—it’s your shaping.
Shaping sourdough is where your dough becomes a loaf.
This step takes the gas created during fermentation and organizes the dough into a structure that can rise properly in the oven. Without proper shaping, even well-fermented dough can lose strength, spread outward, and produce a dense or uneven crumb.
In simple terms:
- Fermentation creates gas
- Shaping organizes the dough into a structure that can hold gas and expand properly in the oven.
What This Guide Covers (and What It Doesn’t)
This guide focuses on how to shape sourdough dough correctly—building structure, tension, and form.
If you want to understand what your crumb is telling you, read our guide on how to read sourdough crumb structure.
If you want to learn how shaping affects crumb style (open vs sandwich), see our guide on how to control sourdough crumb.
In this guide, you’ll learn how to shape sourdough step-by-step, how to recognize well shaped sourdough, and how to adjust your technique based on the dough you’re working with. Once you understand how shaping works, you’ll have far more control over your oven spring, crust, and crumb—no matter what recipe you use.
What Shaping Does:
When shaping is done correctly, it builds surface tension, strengthens the outer layer of the dough, and prepares it for controlled expansion during baking. This is what allows your bread to rise upward instead of flattening out. Ideally, proper shaping creates a balanced crumb that opens beautifully when scored.
If your sourdough dough spreads on the bench, tears during shaping, or collapses and spreads into the banneton, these are all signs that the dough structure and tension were not fully developed during bulk and again failed during shaping.
The good news is shaping sourdough properly is a skill you can learn and improve quickly.
What Shaping Problem Are You Trying to Fix?
Here are some of the most common and frustrating sourdough shaping issues.
- Flat loaf = not enough tension OR overproofed
- Dough tears = too much tension OR weak gluten
- Score won’t open = weak surface tension
- Spreading in banneton = weak shaping OR overproof
- Dense + big holes = poor gas distribution during shaping
We will address all of these in this post. Our goal is to help you have your best bake. Learning how to shape sourdough properly is a big part of that.
Let’s start with what shaping actually is and why it matters so much for baking success.
What Is Shaping in Sourdough?
Learning How to Shape sourdough means learning how to fold and layer the dough in an organized way with sufficient tension to create the necessary strength to bake a good loaf of bread with good height and crumb.
When shaping is loose, your loaf may bake flatter, have sloping shoulders and poor crumb that can’t open well. Shaping is not just forming the dough—it’s controlling how your bread expands in the oven.
How much is too much? Highly organized bread dough may degass from over tightening so it is important to learn how to shape the dough correctly for the outcome you prefer in any given loaf. Practice makes perfect when it comes to shaping. This post covers it all.
How Shaping Sourdough Works for Baking Success:
Learning how to shape sourdough is an important part of the bread making process. I confess, it is one I’m just recently learning to give more attention. and respect. Consequently, my loaf structure has improved quickly. The process of forming your dough into its final structure before proofing makes a hug difference in your bake.
Shaping does three critical things:
- Builds surface tension
- Organizes the internal structure
- Prepares the dough for controlled expansion
Shaping sourdough happens after much of your dough process is completed. Therefore, shaping is your last chance to correct structure before baking. Proper Shaping is critical for the best crumb and loaf structure. Without proper shaping, even well-fermented dough can bake into a flat or uneven loaf.
Benefits of Shaping Sourdough Properly
Builds Surface Tension: Surface tension acts like a skin that holds your loaf together.
This helps:
- Hold the gas and Maintain loaf shape
- Support oven spring
- Improve scoring
Supports Oven Spring: During baking, gas expands rapidly.
Proper Shaping ensures:
- The dough holds that expansion
- The loaf rises upward instead of spreading
For more on this read Steam Baking Sourdough Bread
Improves Crumb Structure: This is true since well-shaped dough:
- Holds gas evenly and promotes good oven spring
- Allows a more open, balanced crumb
To learn more about your crumb read our Sourdough Crumb Structure Guide
Makes Scoring Easier since the dough Surface Tension is Taunt:
If your blade drags or tears:
- The dough may lack surface tension from too loose shaping
Read more about How to Score Sourdough Bread
When to Shape Your Dough
Shaping happens after bulk fermentation. Divide the dough if necessary for two loaves and then pre-shape. Pre-shaping gently organizes the dough. Pre shaping is done to prepare for the bench rest after bulk proofing is completed.
Goal of the Preshape:
- Create initial structure
- Prepare for final shaping
How to Preshape:
- Lightly fold dough into a round
- Use minimal tension
- Let rest 15–30 minutes
This rest allows the dough to relax before final shaping. This is where you build strength and tension.
Goal of final shaping:
- Create a tight outer surface
- Trap internal gas
- Prepare for oven spring
Proper Shaping Technique:
- Stretch and fold dough inward
- Use the bench to create tension
- Tighten the surface without tearing
After the final shape your dough is ready to do its final rise in the banneton before score and bake.
How to Shape Sourdough Boules
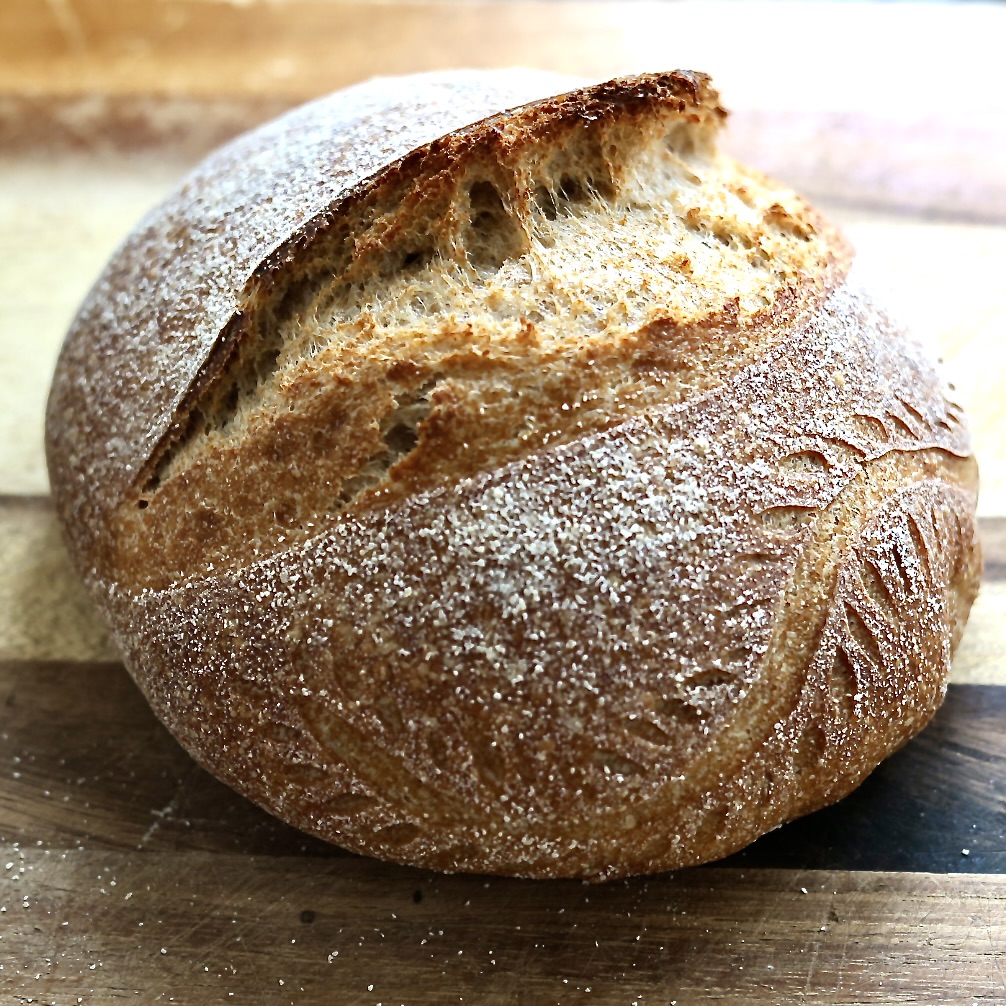
I have most of the steps pictured below for you. There is one step I could not photograph. That is when you pull the other side of the dough up and over and then pull the dough tight on the counter.
Step-by-Step Shaping (Photo Gallery)
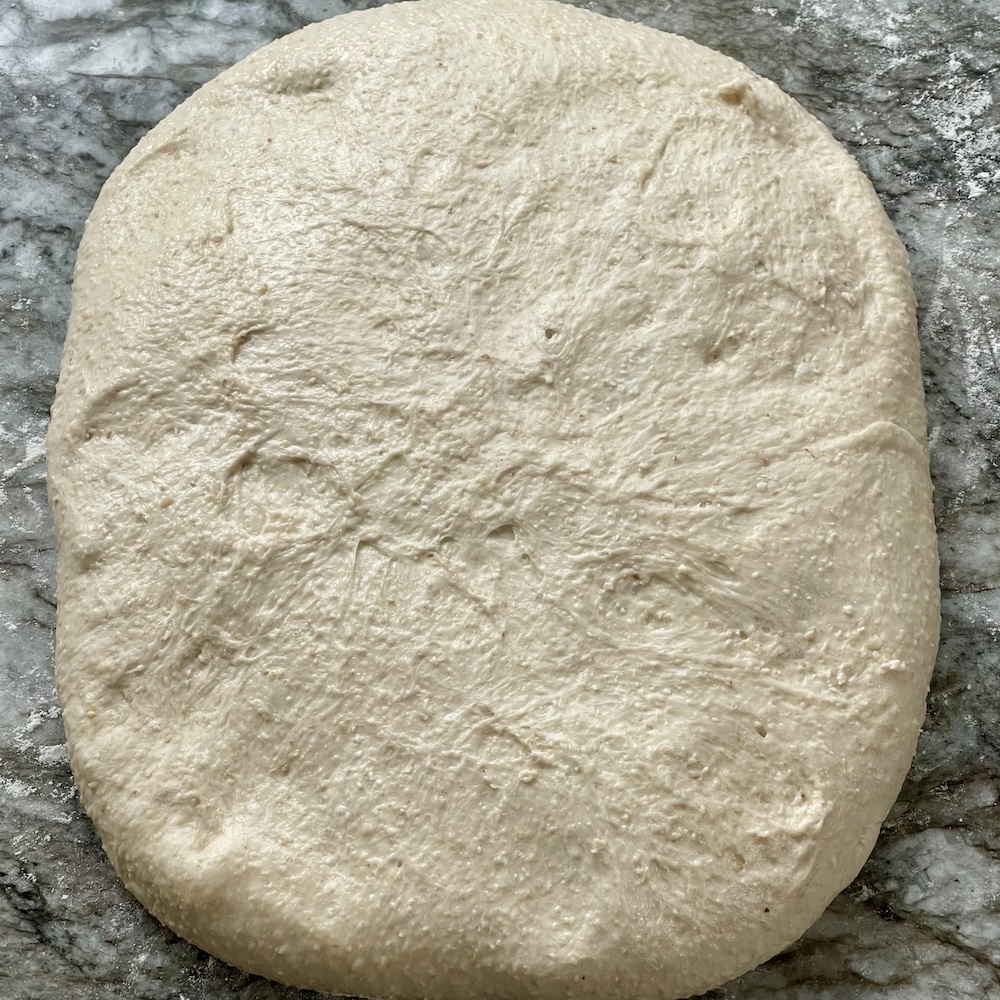
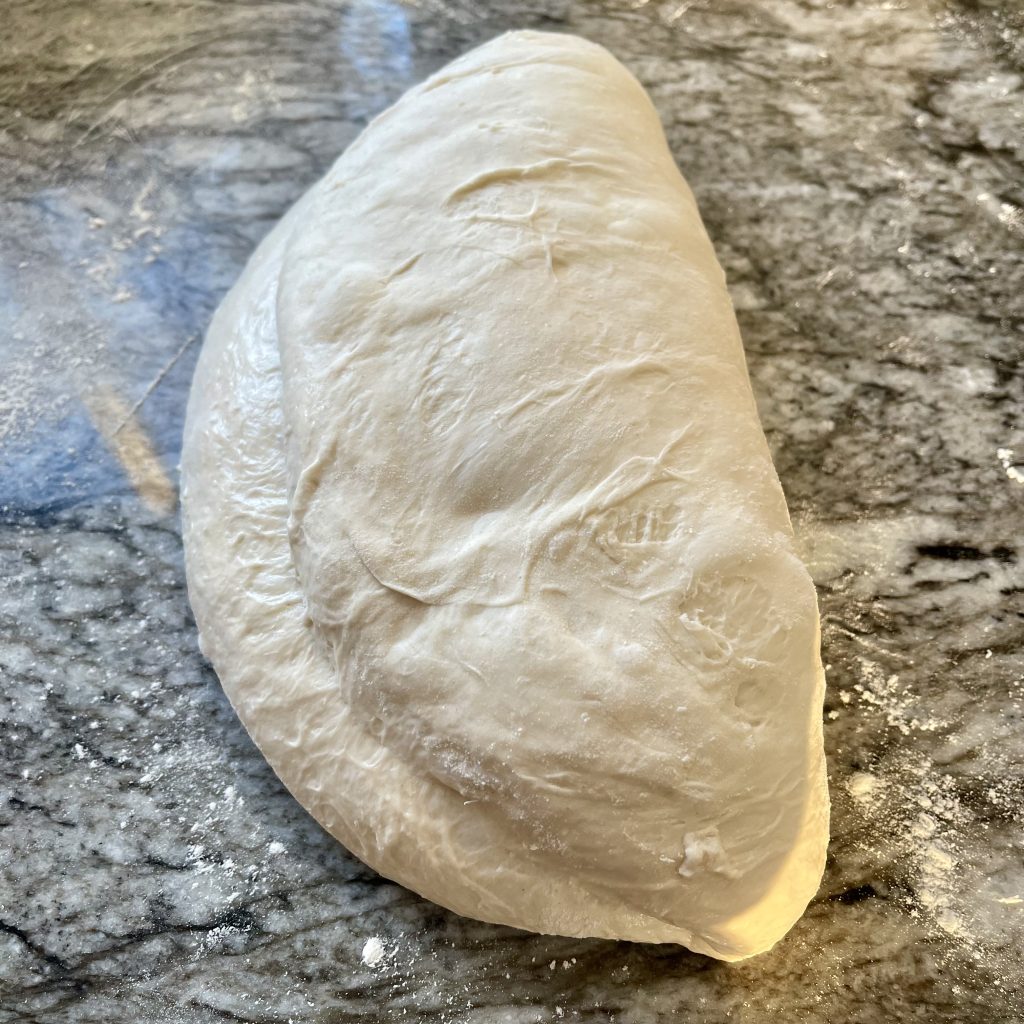
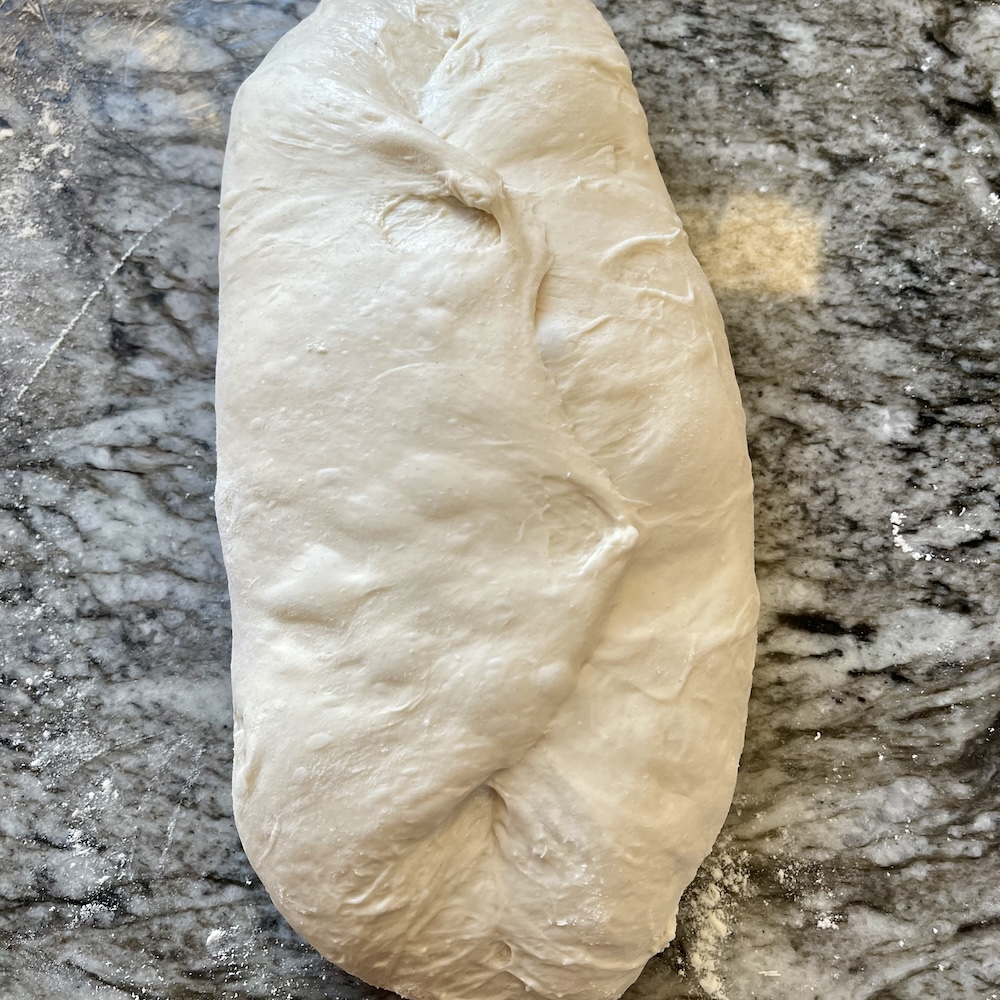
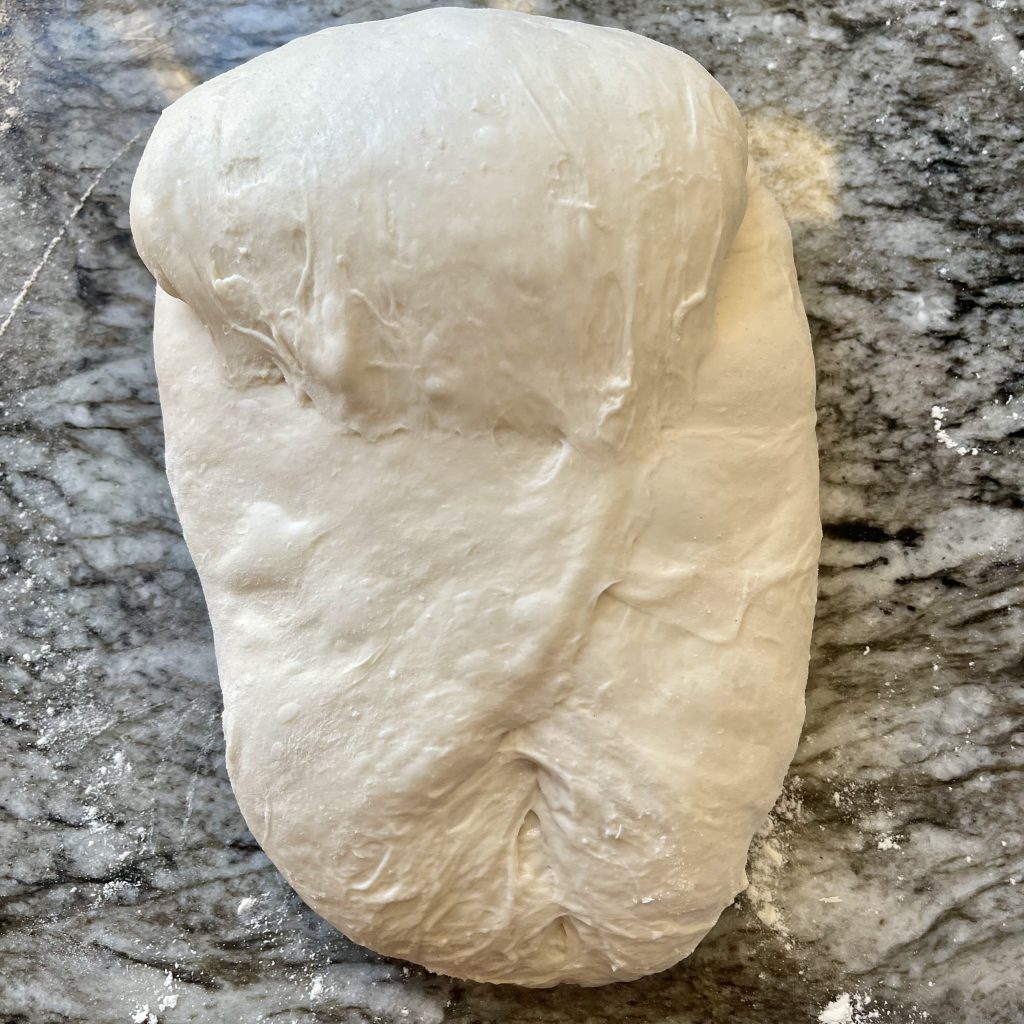
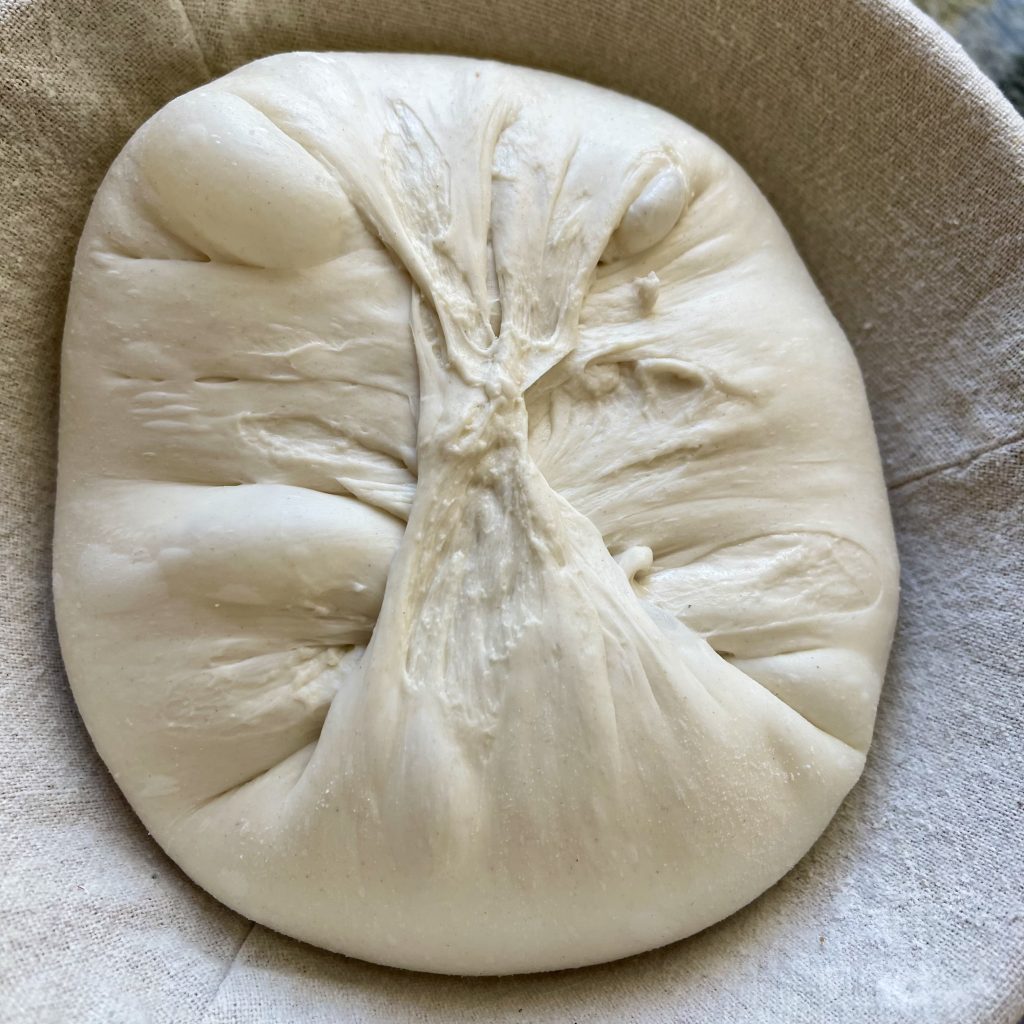
Please refer to the video below for a full demonstration of the process, including learning how to shape the dough for our Beginner Artisan sourdough bread.
Boule (Round)
- Round shape
- Even expansion
- Good for beginners
Can You Use This Method for a Batard?
Yes. The shaping principles in this guide apply to both round (boule) and oval (batard) loaves.
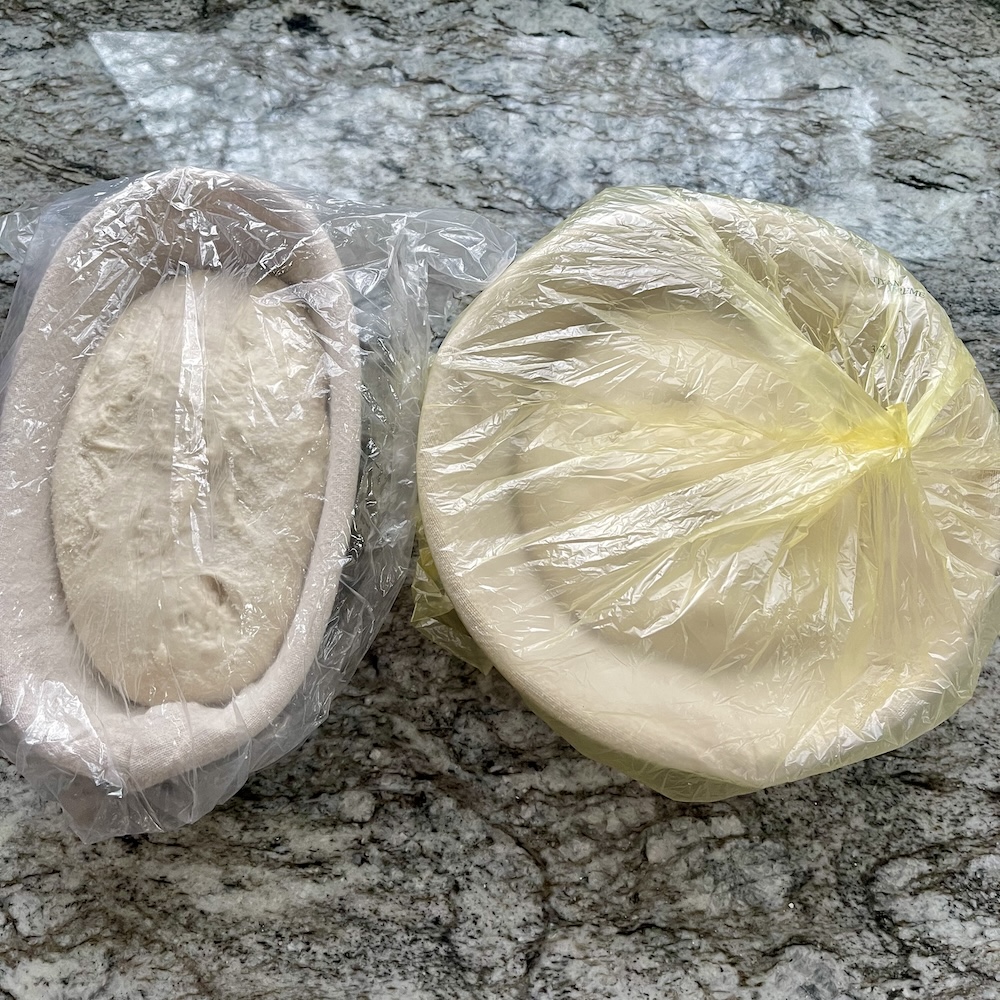
The difference is simply in how the dough is folded and tightened:
- A boule is shaped evenly in all directions to create a round loaf
- A batard is shaped with more length, using folds that build tension along a central axis
In both cases, the goal is the same:
- Build internal structure
- Create surface tension
- Seal the seam without tearing the dough
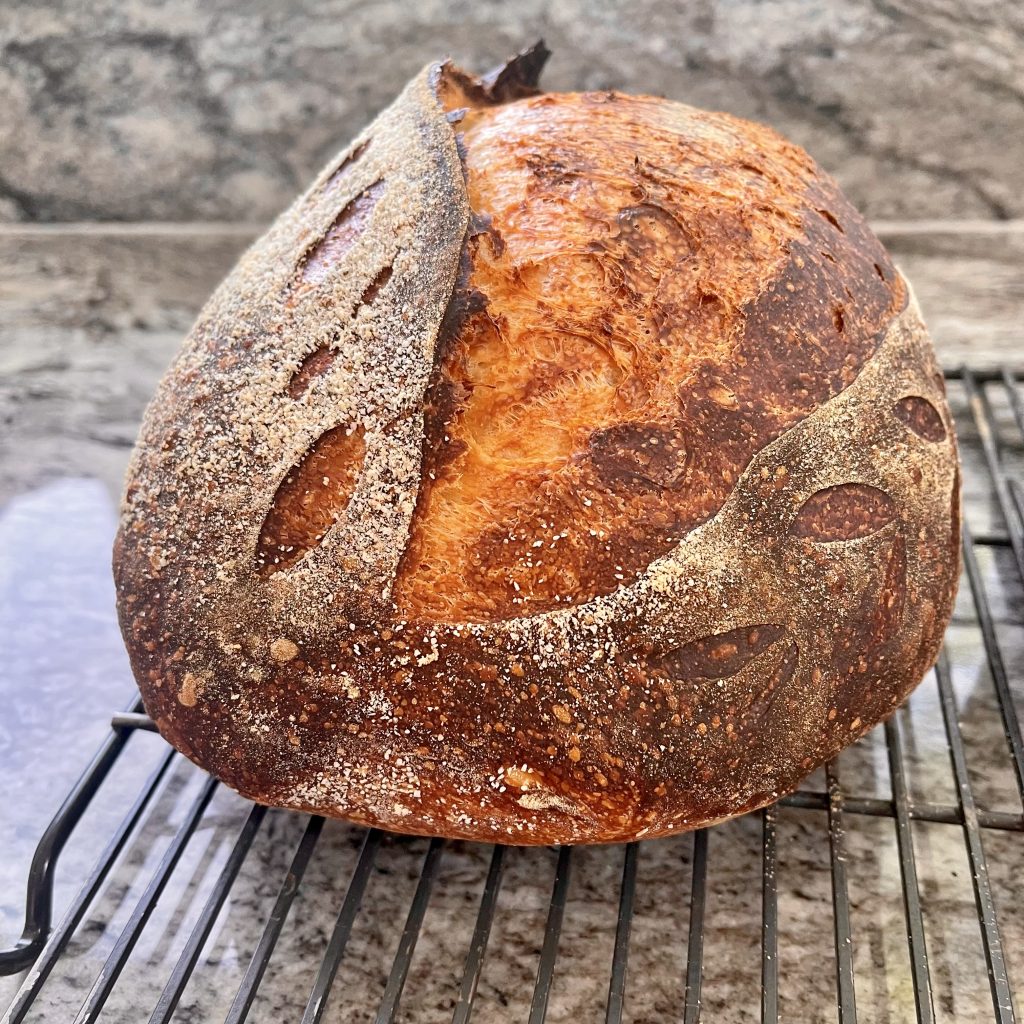
If you can shape a boule successfully, you already understand the fundamentals needed to shape a batard. In the picture gallery for the boule further up this post, notice the shape after step three is very close to a batard. From there you simply tighten the dough, roll it a bit to the length you want and close the ends.
- Oval shape
- More directional oven spring
- Pairs well with scoring for ears
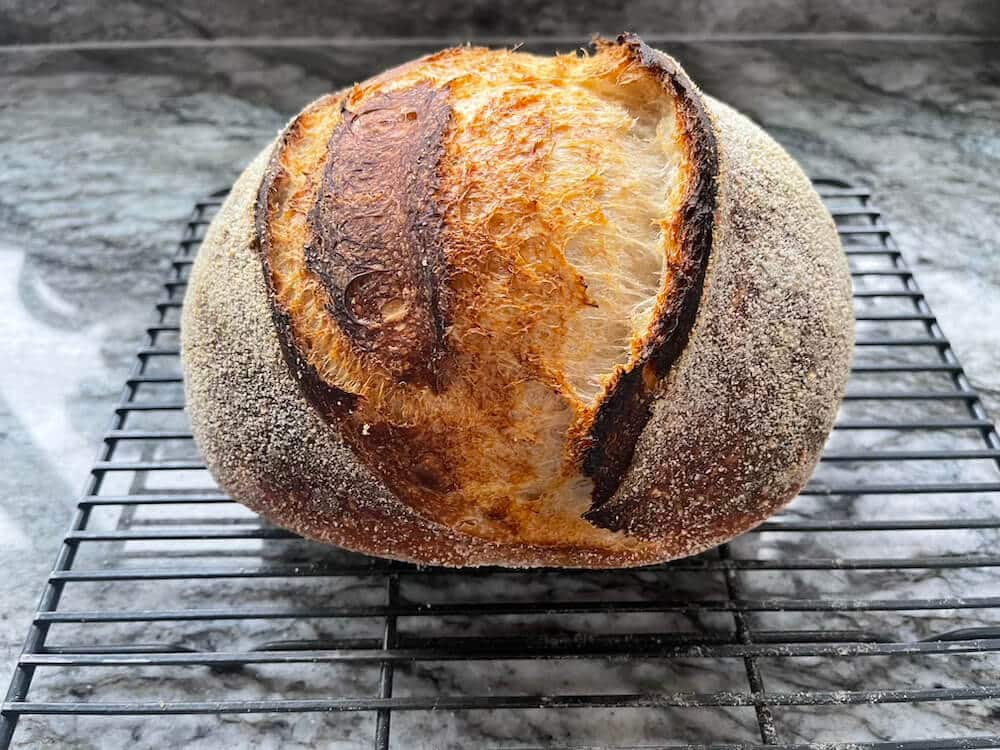
What Your Dough Should Feel Like Before Shaping
learning how to shape sourdough when you make a bread from sourdough takes some practice. There are MANY variables that impact shaping. Flour blends, accurate measurements, and hydration are big ones.
But also how you create dough structure with your fermentation process and folds. It all works to build what you are working with at the sourdough shaping point.
What Properly Developed Dough Feels Like When You Shape It
Feel the dough as you work it. When learning how to shape sourdough, your hands need to know these things.
Correct dough:
- Slight resistance when pulling
- Smooths as you tighten-if you go too far, the dough will tear. Relax dough before proceeding carefully
- Holds a round shape after 10–15 seconds
Underdeveloped dough:
- Spreads immediately if no structure or air
- Feels slack, dense, no resistance
- Won’t hold folds
Overproofed dough:
- Feels “puffy but weak”
- Very airy but fragile
- Tears easily
Ideally Dough Should Be:
- Slightly airy but still elastic
- Holds shape when turned out
- Not overly sticky or slack
Then Dough will be able to hold the shape you build.
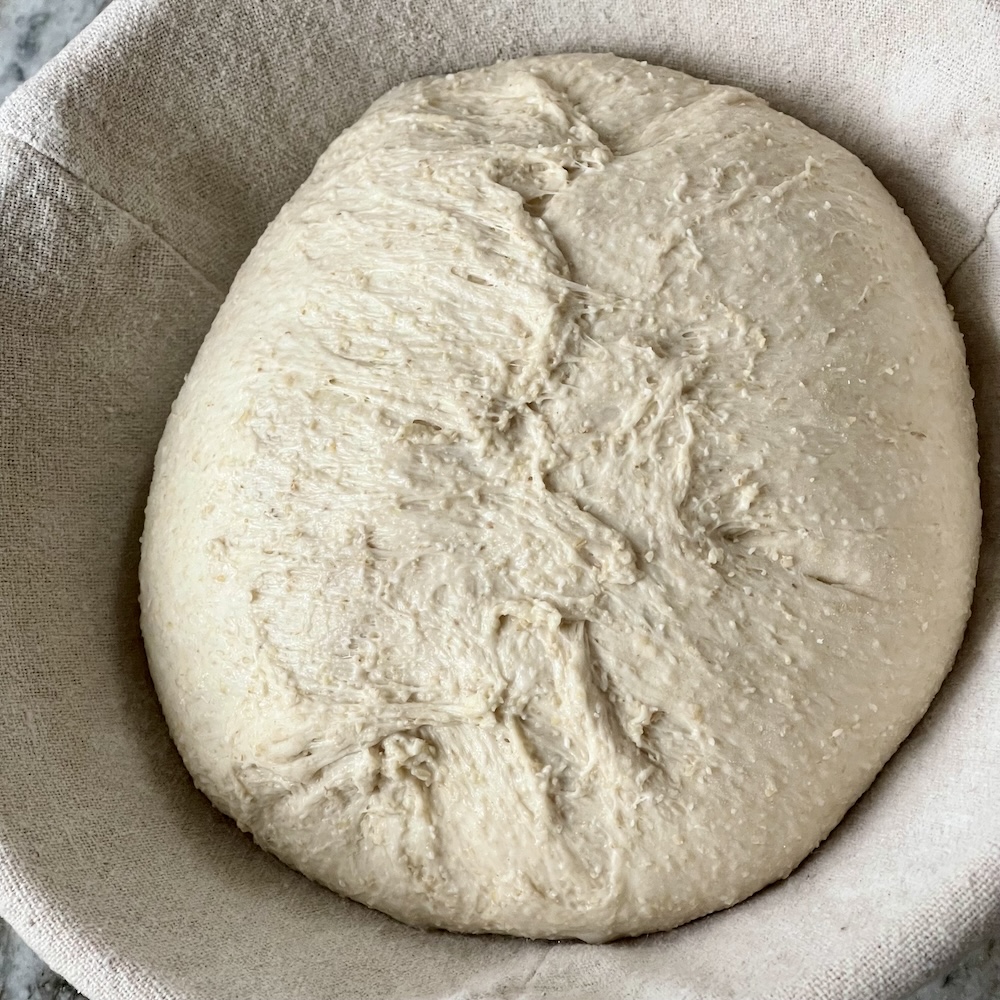
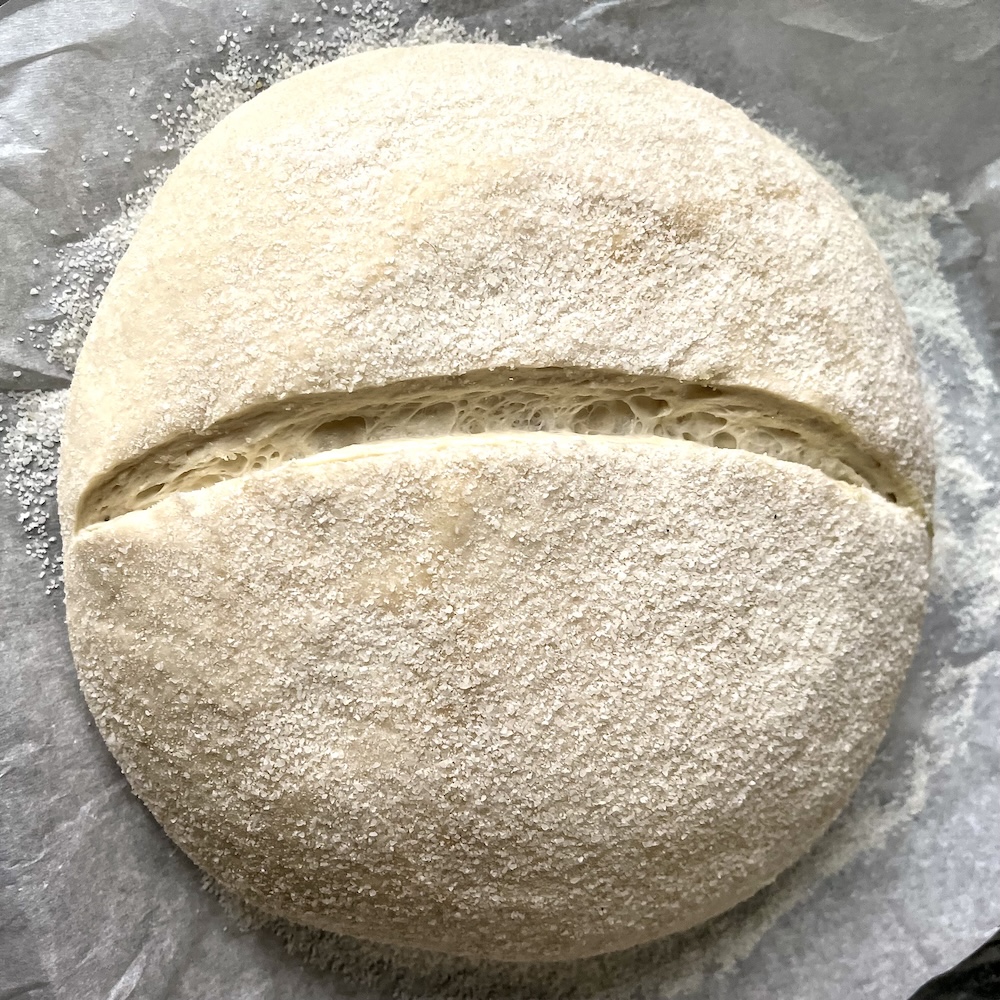
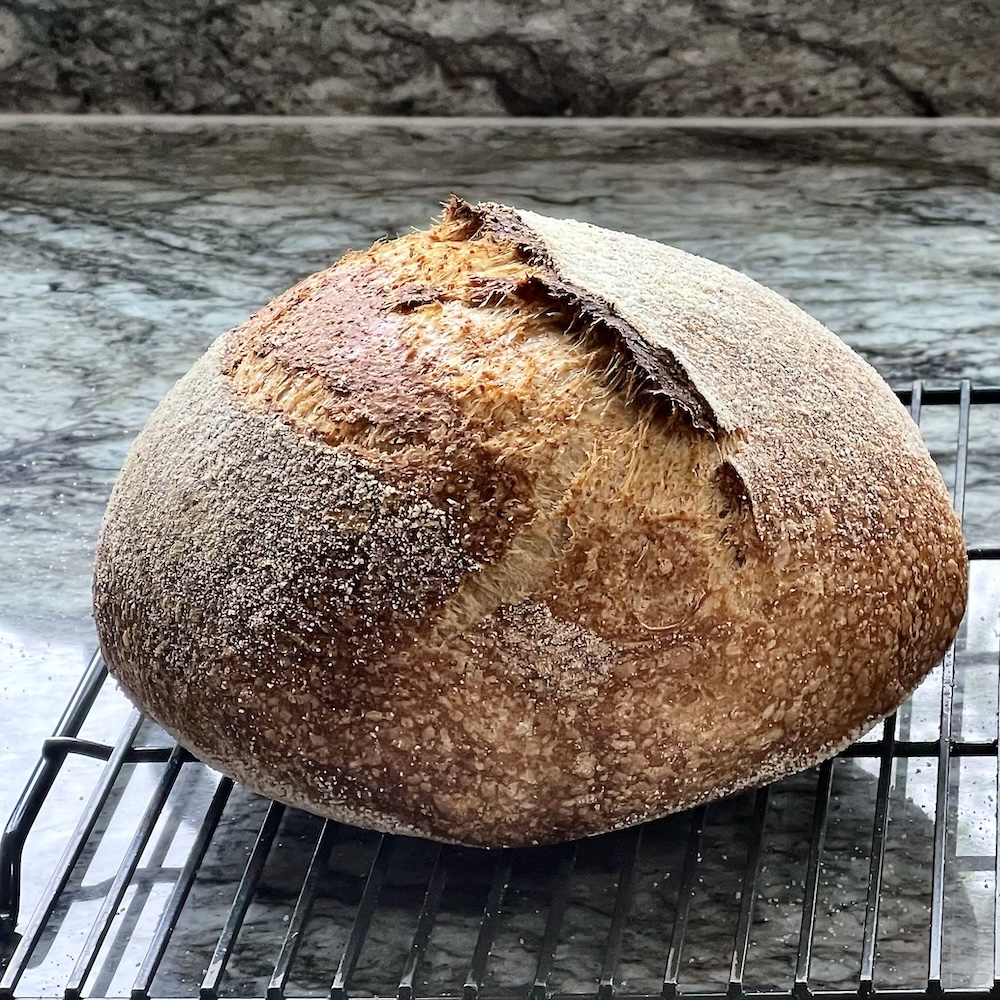
Spelt blend dough is trickier to structure since it tends to be very extensible. A lower rise is expected but the basic loaf structure is built correctly.
However, Not all dough behaves perfectly.
If your dough feels sticky, slack, or difficult to handle, you can still shape it successfully—but you need to adjust your approach. And accept it may have some problems. It can still make good bread. But the structure of the loaf may not be ideal. We do our best and improve with practice and experience in these more difficult doughs.
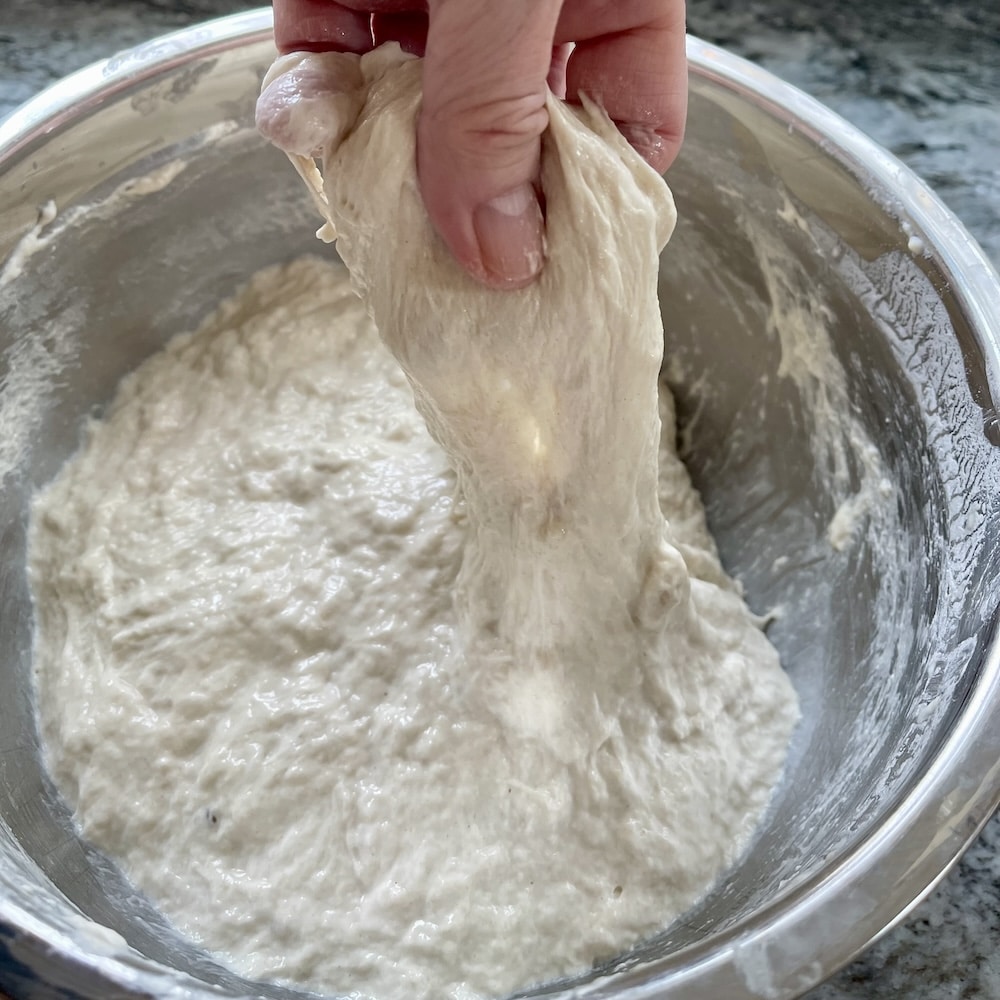
Many higher hydration doughs and whole grain flour blends make a sticky, loose dough. Under-structured doughs are very tough to properly shape. Over proofed doughs can also cause slack, sticky dough.
If you get to pre shape and your dough is weak or highly-hydrated it may feel slack and sticky with lots of stretch (extensibility) but no or little elasticity. This makes dough shaping extra-ordinarily difficult and it will often lose structure. To some degree this is normal and expected for these types of dough. but you want to build the best bread you can for optimal rise and bread structure.
If your dough is at pre-shape stage and feels
- sticky
- slack
- spreading
Here are some tips.
- Shaping slightly earlier in bulk can help preserve structure and prevent spreading.
- At pre shape work the dough gently to see if it needs more time proofing. Dense dough with low aeration will lead to a dense bread. This is a judgement call you must make. Read our proofing guide for more help on proofing.
- Gentle reshaping after a flat bench will help capture structure before a cold proof. You can bench a second time after another pre-shape for better results.
- LIGHTLY dust your work surface and hands with flour to help reduce dough stickiness and improve workability. But you need some traction for shaping so don’t overdo the flour.
- With light, gentle hands pull the dough into shape as best you can. if the dough cannot hold shape, you’re in for a flat loaf. It may still be good bread in some ways but not structurally.
How to Shape Weak or Sticky Dough
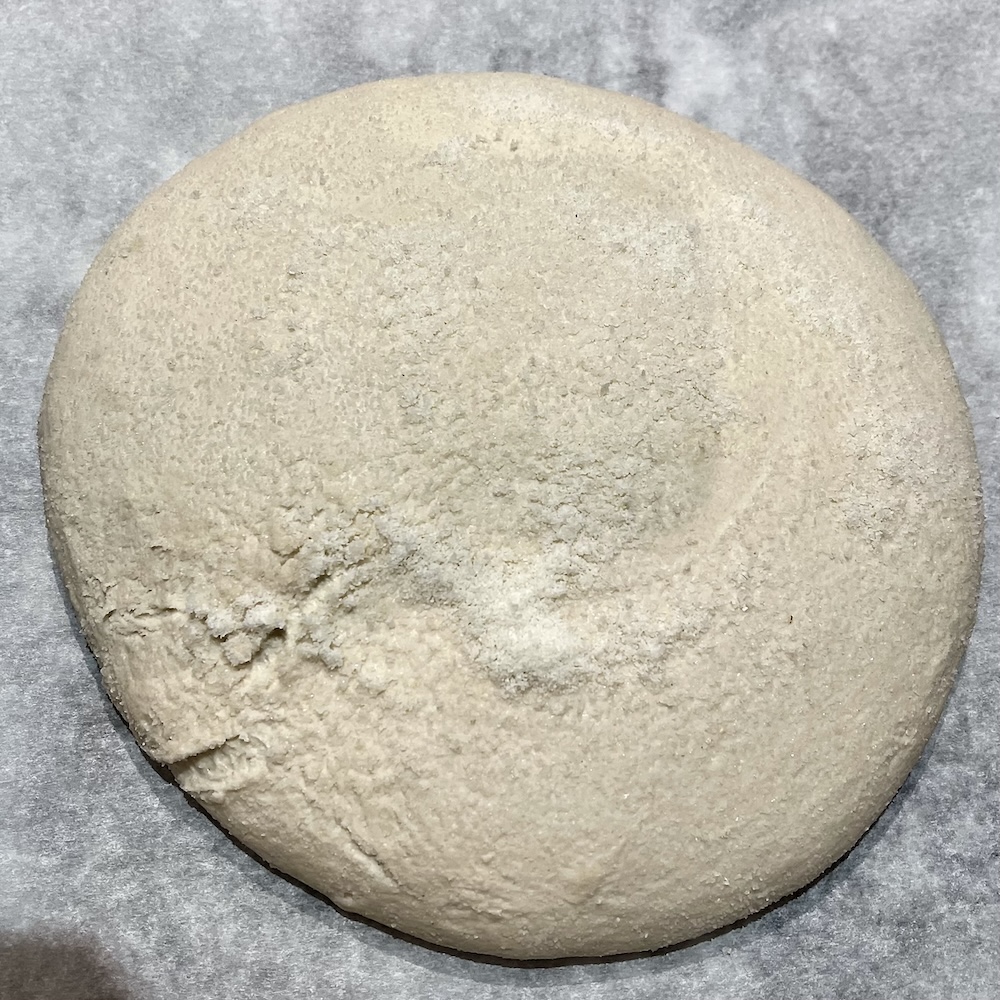
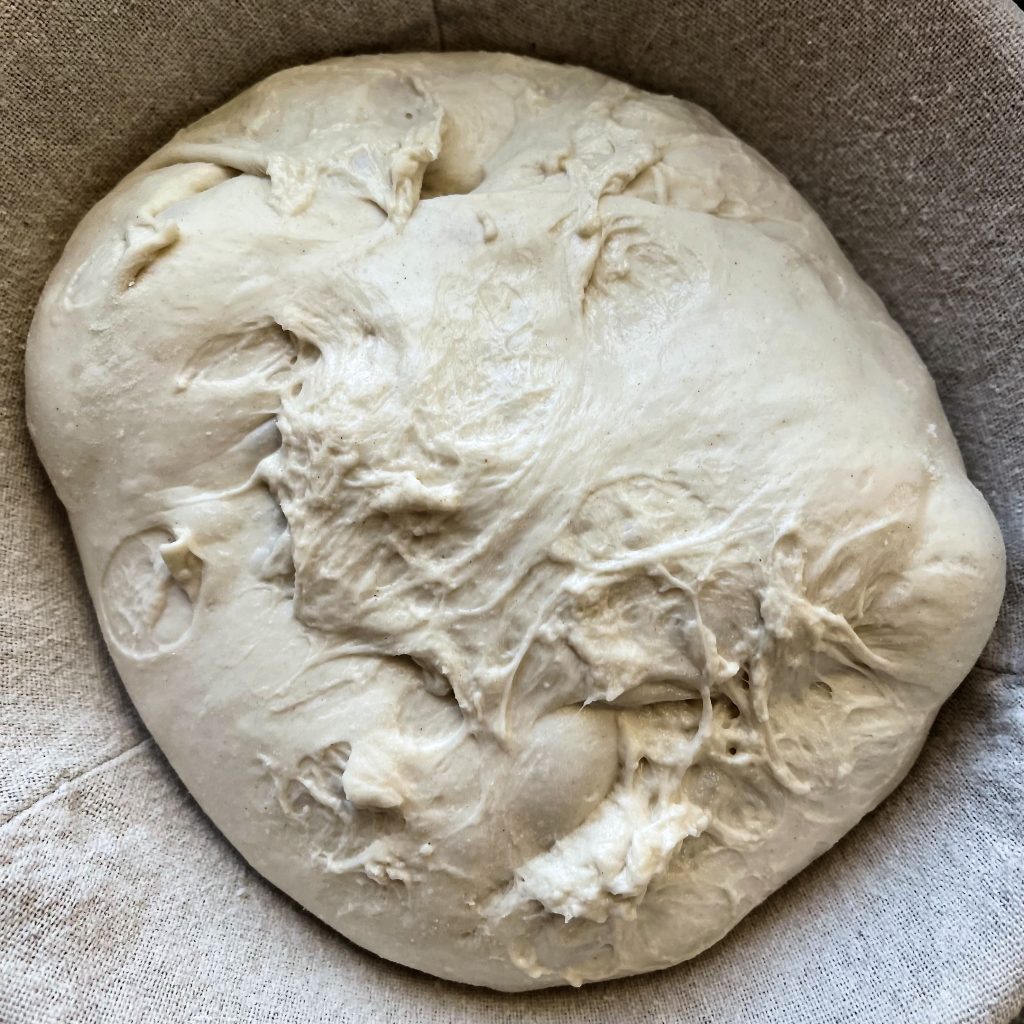
As the dough goes through the various processes of structure building with folds and coils, and the bulk rise and cold proof), the dough will get stronger and more workable. But high hydration doughs require gentle handling to keep air in them and this can make shaping difficult. How to shape sourdough like this? it is challenging.
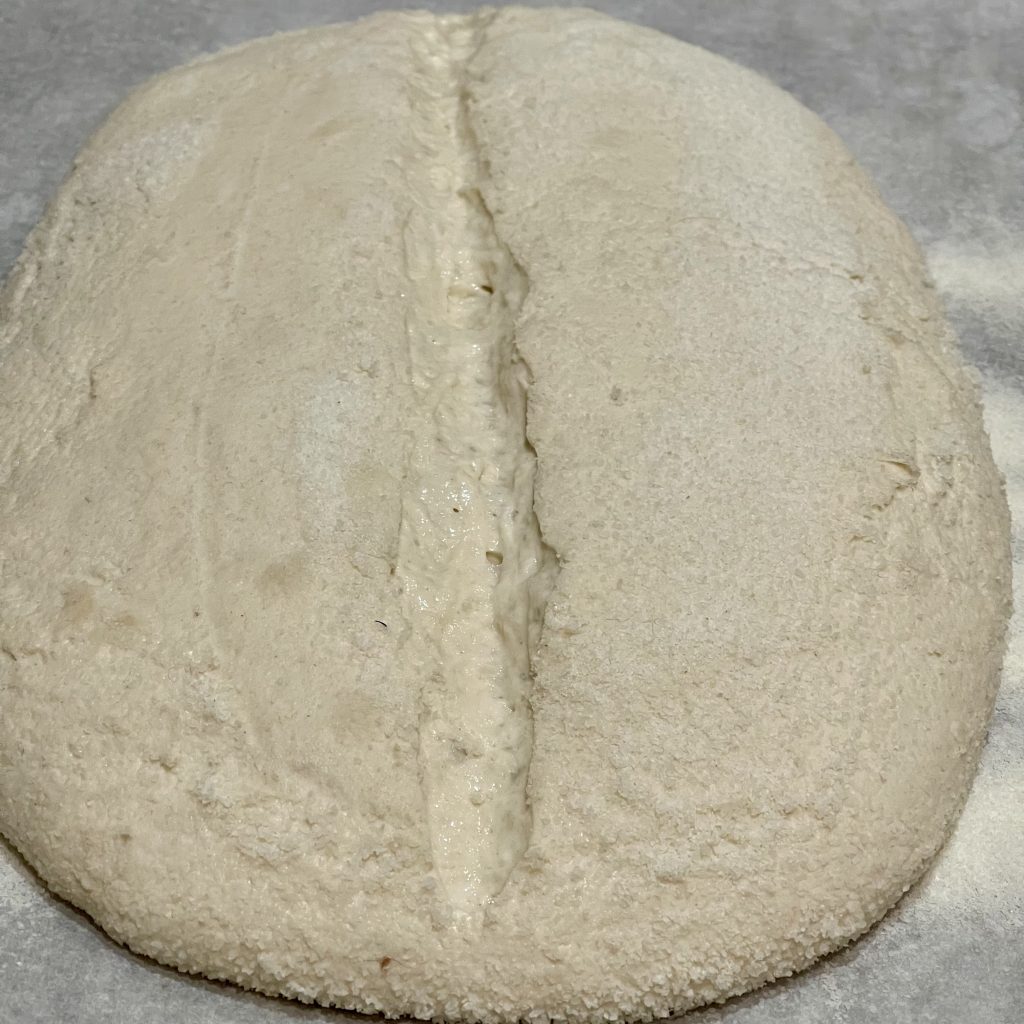
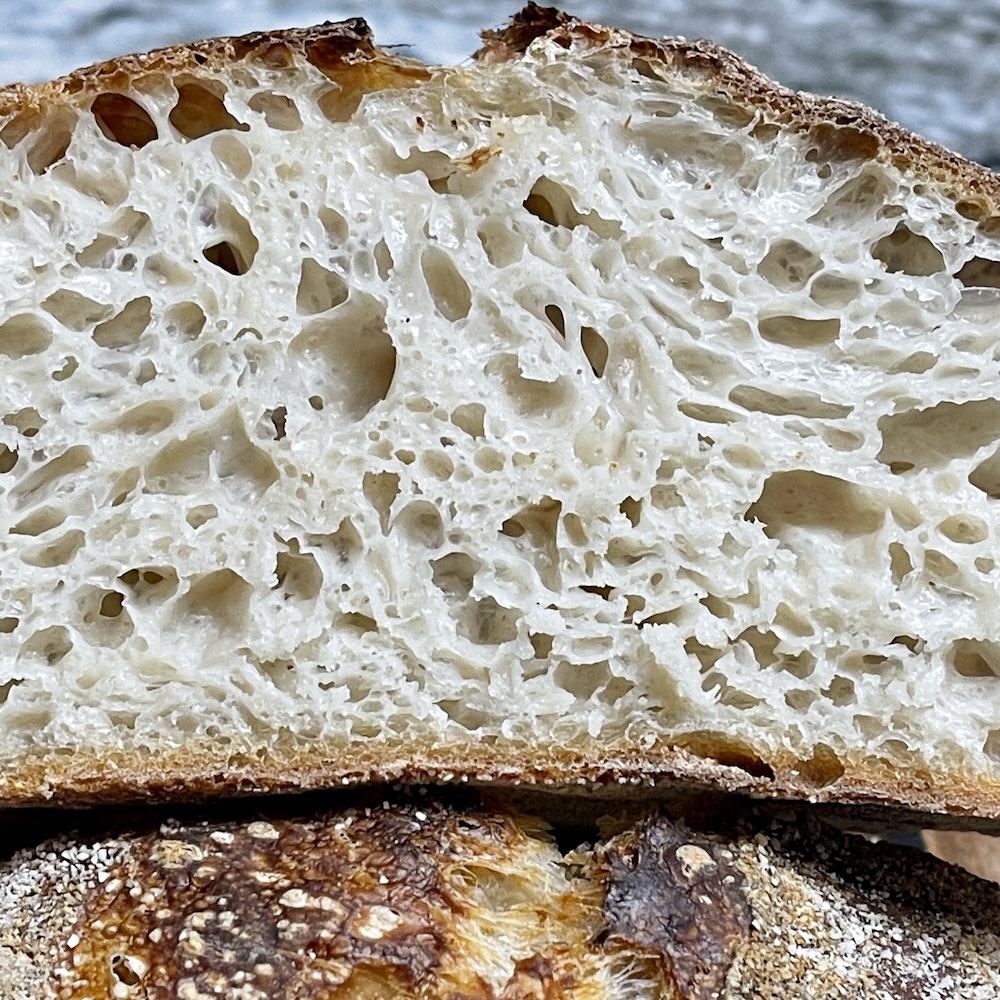
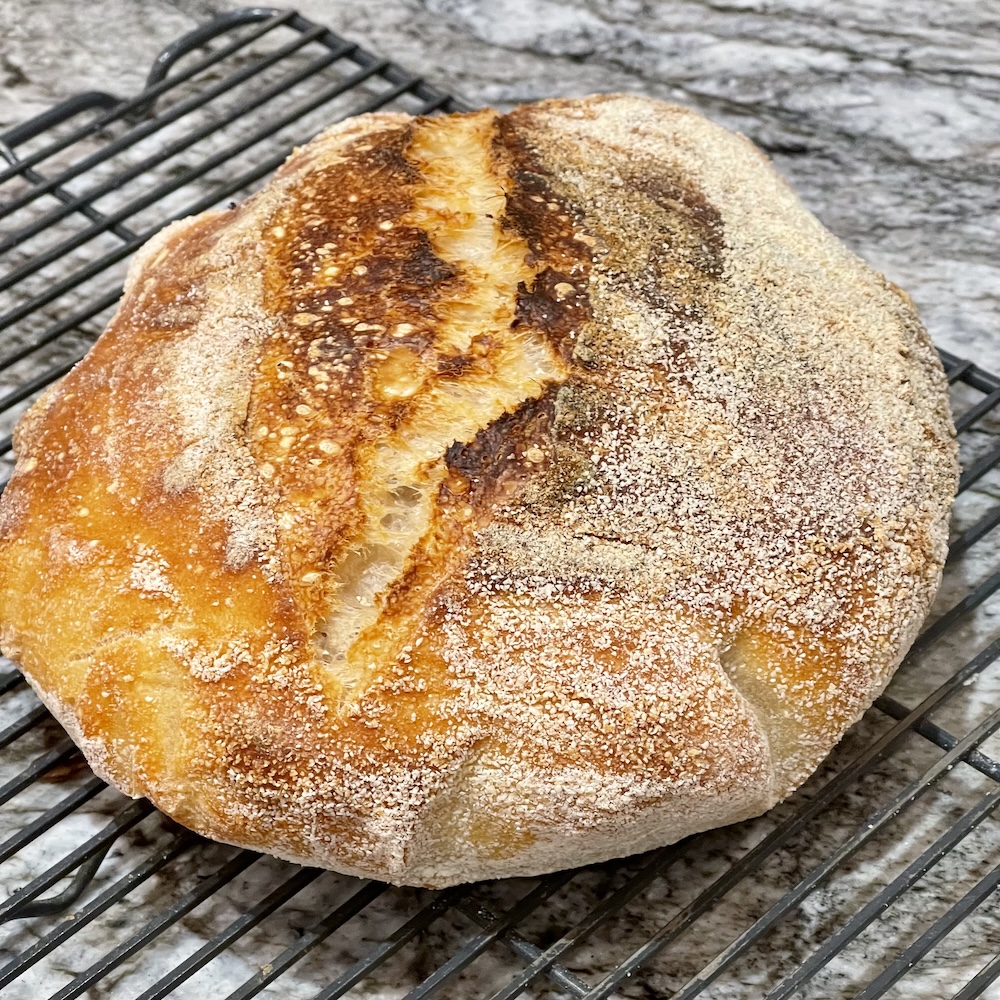
Process adjustments that May Help:
- Build structure early with stretch and folds or coil folds
- Bulk rise should move quickly with high hydration or whole grain doughs. So keep an eye on it and don’t over proof.
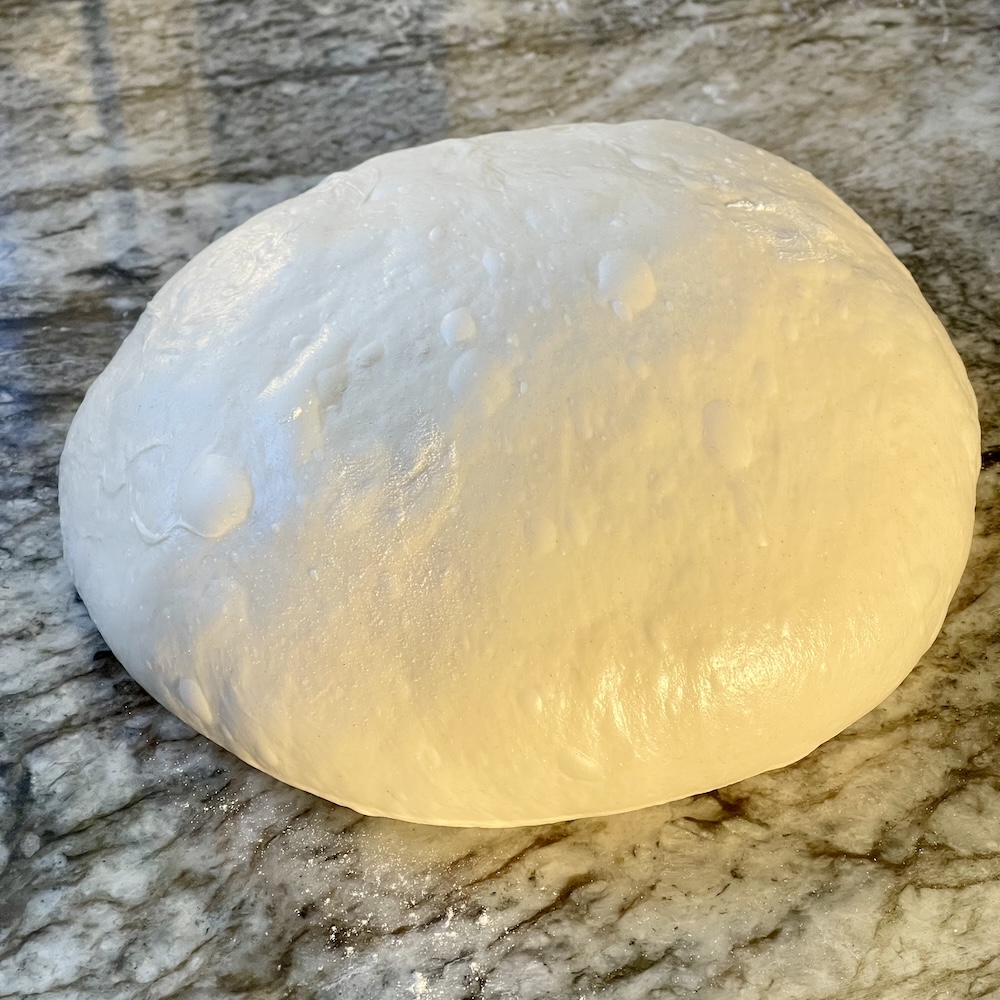
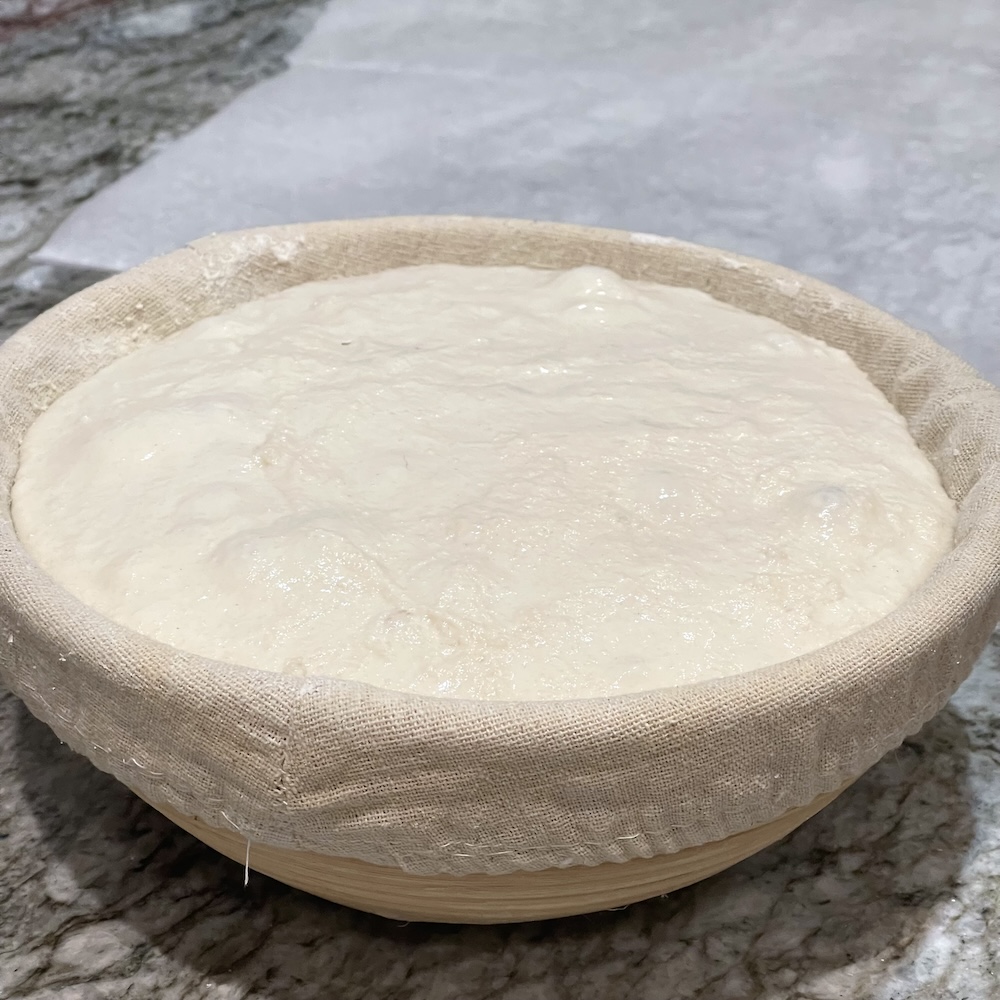
- Shape earlier at about 30 to 50% rise to retain some structure in the dough (the dough pictured above went too far). And when dough gets too full of air it is even MORE difficult to handle.
- Use slightly more tension than usual. Coil folds will build structure gently and organize the dough better without over stretching the dough.
- Keep bench rest short. You dough will tend to go flat quickly so work it earlier to retain what structure it has.
- Move to cold proof quickly. Here is the tricky part. Judgement call. Is proof done or nearly so?
- Keep Final Cold Proof Short: If your dough is close to full proof, preheat the oven while dough is in fridge (this helps cool the dough for better scoring and slow down proof), after preheat bake immediately.
Common Shaping Mistakes And Impact On Your Bake
As we see pictured above when learning how to shape sourdough, you have to learn to work with the dough you have. Whole grain doughs and those with higher hydration can be delicate. With good shaping we can improve a poorly structured dough and the bake will reflect that in better spring and crumb.
But this also works against you if your shaping techniques need work.
Common Shaping Problems Include:
- Over-tight shaping -can reduce the crumb openness and spring. Dough tearing- stretching the dough too far indicates over tightening during shaping. This will reduce the doughs ability to open in the oven and release the crumb evenly.
- Weak seam– dough can open during cold proof or baking in an uncontrolled way. Impacts oven spring and crumb development
- Lax dough– Not tightening enough during shaping, will lead to loose dough that doesn’t score well and cannot spring fully in the oven. This results in a compromised, dense crumb and poor loaf shape, once baked.
Sometimes it is difficult to understand what went wrong in a bake. Learning how to shape sourdough correctly for your bake, takes one big variable off the table.
Dough Spreads Out
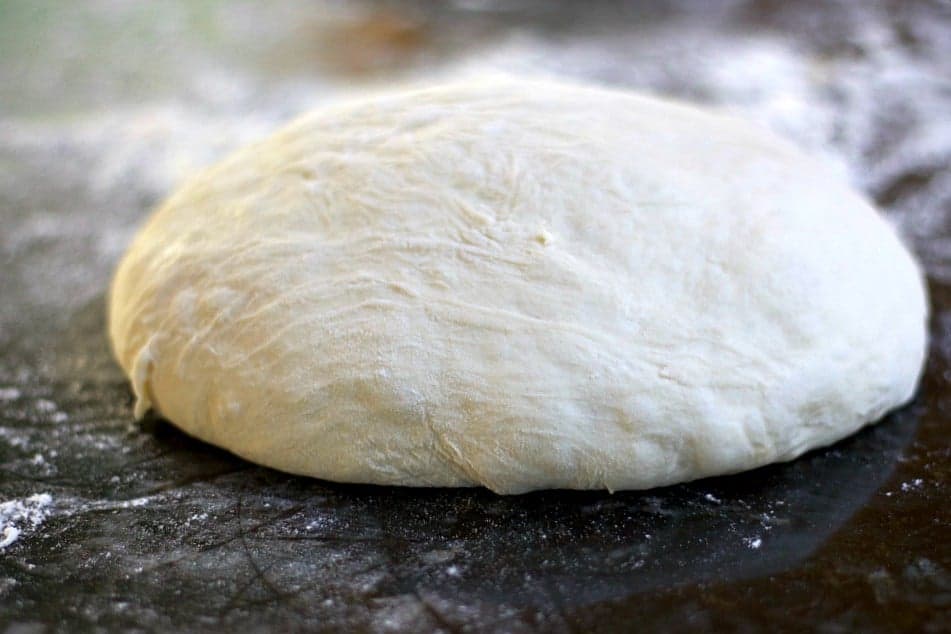
This is a sign of structure problems due to weak structure in dough building and shaping. When learning how to shape sourdough, remember to find the doughs sweet spot. with experience this will get easier.
- Not enough tension
- Weak shaping
Dough Tears
If your dough tears during shaping—you’re pulling tighter than the dough skin can handle.
- Too aggressive
- Over-tightening
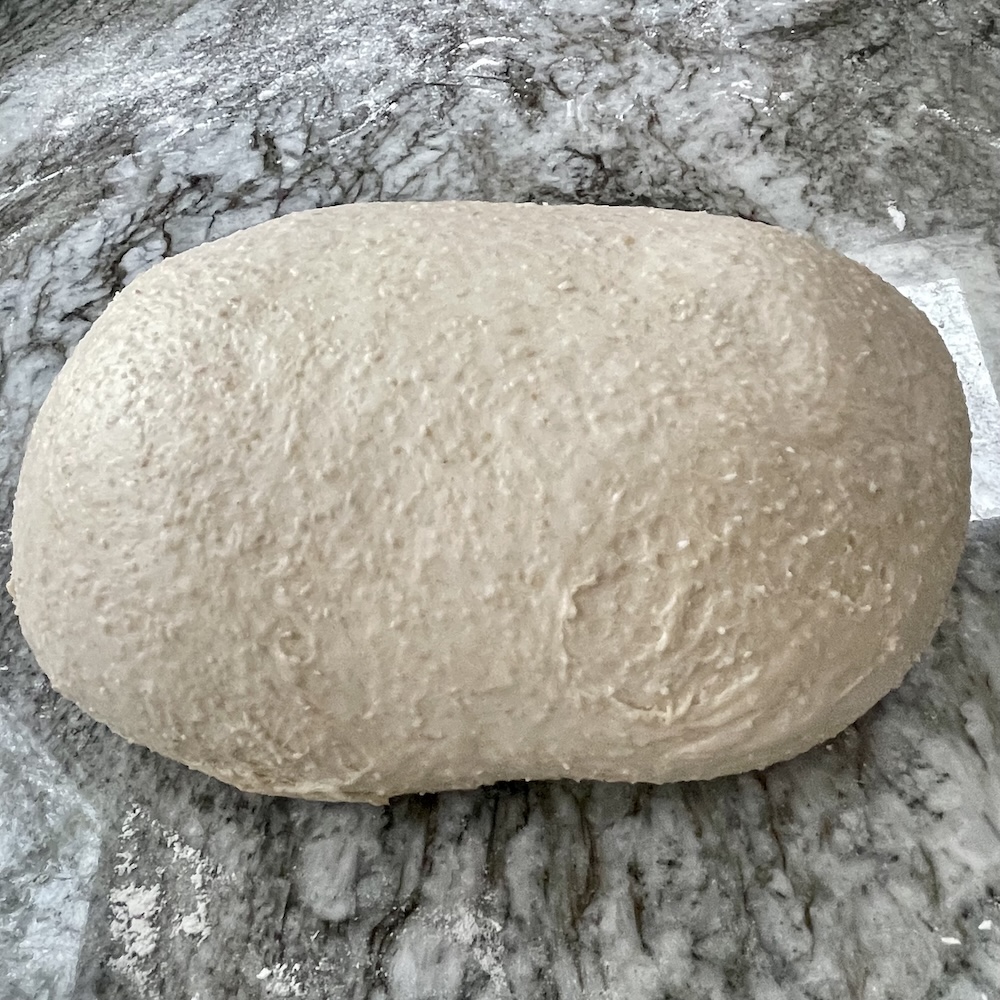
Dense Crumb
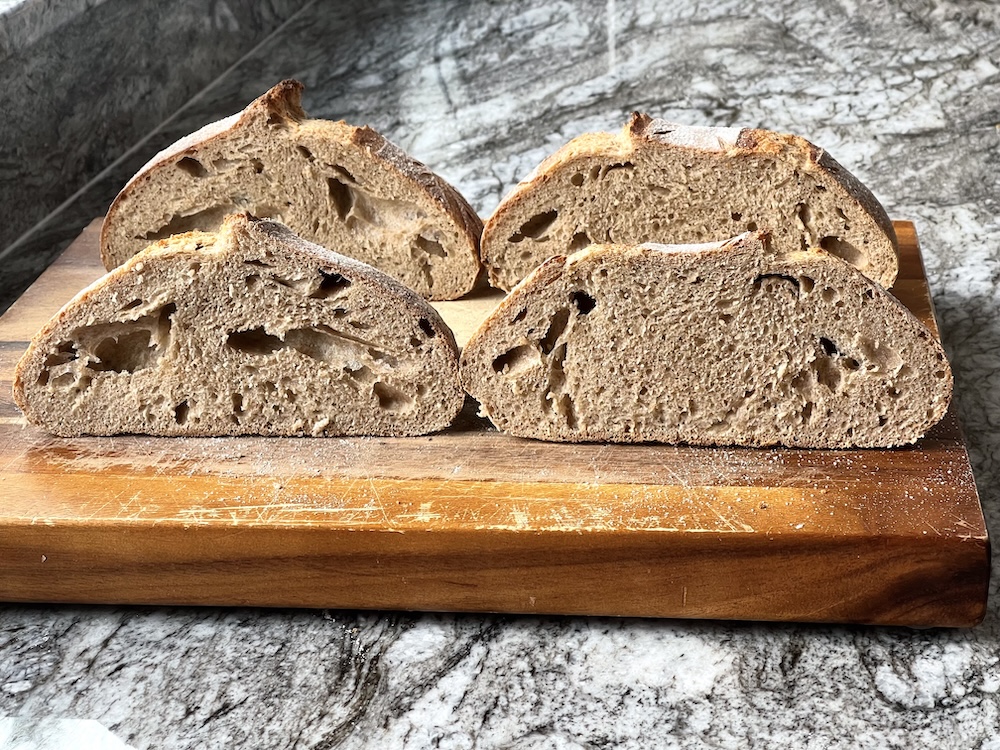
- Gas pushed out inconsistently during shaping is one reason for dense bread.
For more on Dense crumb in sourdough See: Why Sourdough Bread Turns Dense
Poor Oven Spring
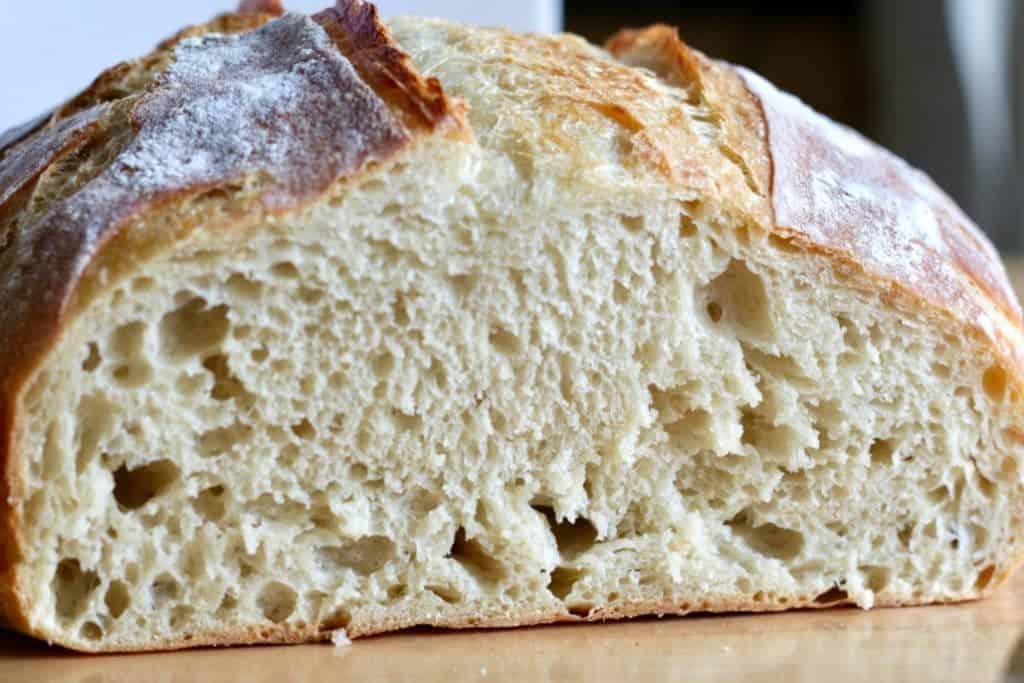
- Weak structure
- poor gas distribution
- under proofing
For more on dough proofing See: How to Proof Sourdough Bread
Being Too Gentle
Fragile doughs are very difficult to shape. They tend to be extremely sticky and full of air. To avoid degassing and tearing a highly fragile dough like this requires gentle handling. The shaping tension often suffers.
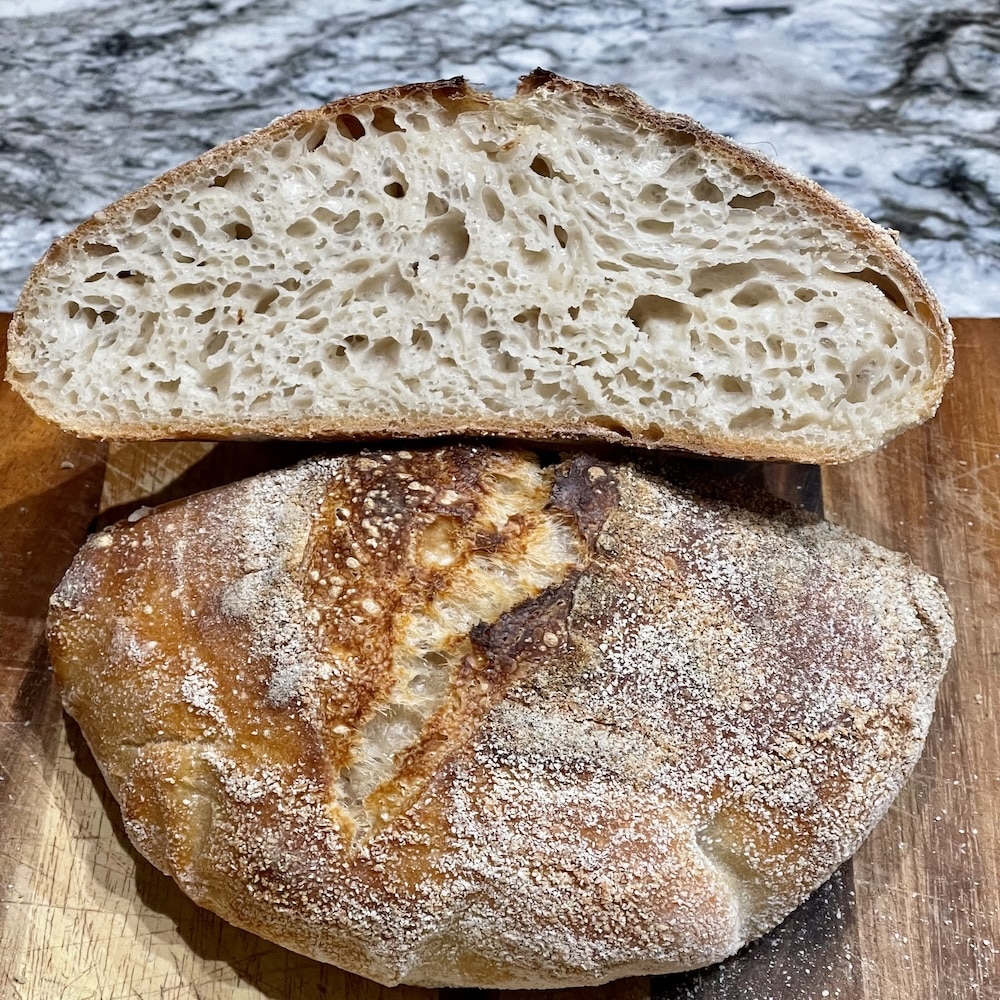
Over gentle handling:
- doesn’t build enough tension
- dough spreads later while cold proofing or during early baking. Oven spring, crumb and loaf shape suffers.
For even more visual expertise on how to shape sourdough take a look at Master Baker Trevor Jay Wilsons Instagram. He does a lot of excellent shaping demonstrations.
Why Oven Differences Change Your Shaping Results
We all have different ovens with different baking personalities, if you will. I have a new gas oven, after years of baking in a convection electric. There is a learning curve. That has prompted me to bring this up.
If your Oven Is:
- Strong oven (runs hot) will have faster oven spring. This will compensate to some degree for shaping issues.
- Weak/dry oven = shaping must compensate more since heat tends to go low, or learn to recalibrate your oven temp in recipes to compensate for this.
- Convection function = dries surface faster. This can reduce expansion if overdone. Don’t use convection during steaming of the loaf. It may work best for the last half of the bake to help dry the loaf.
If using convection:
- consider switching to conventional bake for better oven spring while lid is on. For open bakes do not use convection.
- Or use convection fan after lid removal to help dry the loaf for better crust and crumb.
How Shaping Works With the Rest of the Process
Properly shaped sourdough in only one component of the bread making system that controls how your bread rises and bakes. Here is where shaping falls in the process.
- Fermentation-creates gas
- folds-create early structure
- Gluten-holds gas
- Shaping -organizes structure, creates necessary tension for oven spring and protects or helps distribute gas properly through the dough for the crumb you want to build.
- Scoring -directs expansion
- Steam -allows expansion
If shaping is weak, the dough fails to reach its optimum potential as it bakes. This is why the Tartine style loaves tend to be less well constructed, with sloping shoulders a typical outcome of this baking style. It is intentional. Tartine loaves use cold bulk and light shaping to retain and build flavor with a wild open crumb.
Does Shaping Affect Getting an Ear?
Yes—but not in the way many bakers think.
An ear forms when your scored dough expands rapidly in the oven. While scoring and steam control how the crust opens, shaping determines whether your dough has the strength to create that expansion in the first place.
- Good shaping builds surface tension, creating a strong outer “skin”
- This tension helps direct oven spring upward instead of outward
- A well-shaped loaf supports a clean score that can lift and form an ear
- Weak shaping often leads to flat loaves with little or no ear, even if scoring and steam are correct
If you’re struggling to get a pronounced ear, shaping is often part of the issue—but it works together with proper scoring and steam.
Learn more about scoring technique and ear formation in: How to Score Sourdough Bread Confidently
And how steam affects oven spring in: How to Steam Bake Sourdough Bread
How to Tell if Your Dough is Properly Shaped
After placing your dough into the banneton, its shape will tell you if you’ve built enough tension. Does it hold shape or does it slump into the cloth? Don’t aim for perfection—aim for structure. With practice it will all get better and easier to determine if you’re shaping properly for the loaf you want to bake.
Signs of Properly Shaped Dough Include:
- Rounded, defined edges The dough should sit in a clear shape and not spread flat into the sides of the banneton.
- Slightly lifted, not slumping The center should feel supported, with the dough holding itself rather than sinking or flattening.
- Edges curve inward slightly Well-shaped dough pulls gently toward the center. If it’s pushing outward and filling the basket loosely, it likely needs more tension.
- Seam is mostly closed Small openings are fine, but the dough should look contained and not unraveling.
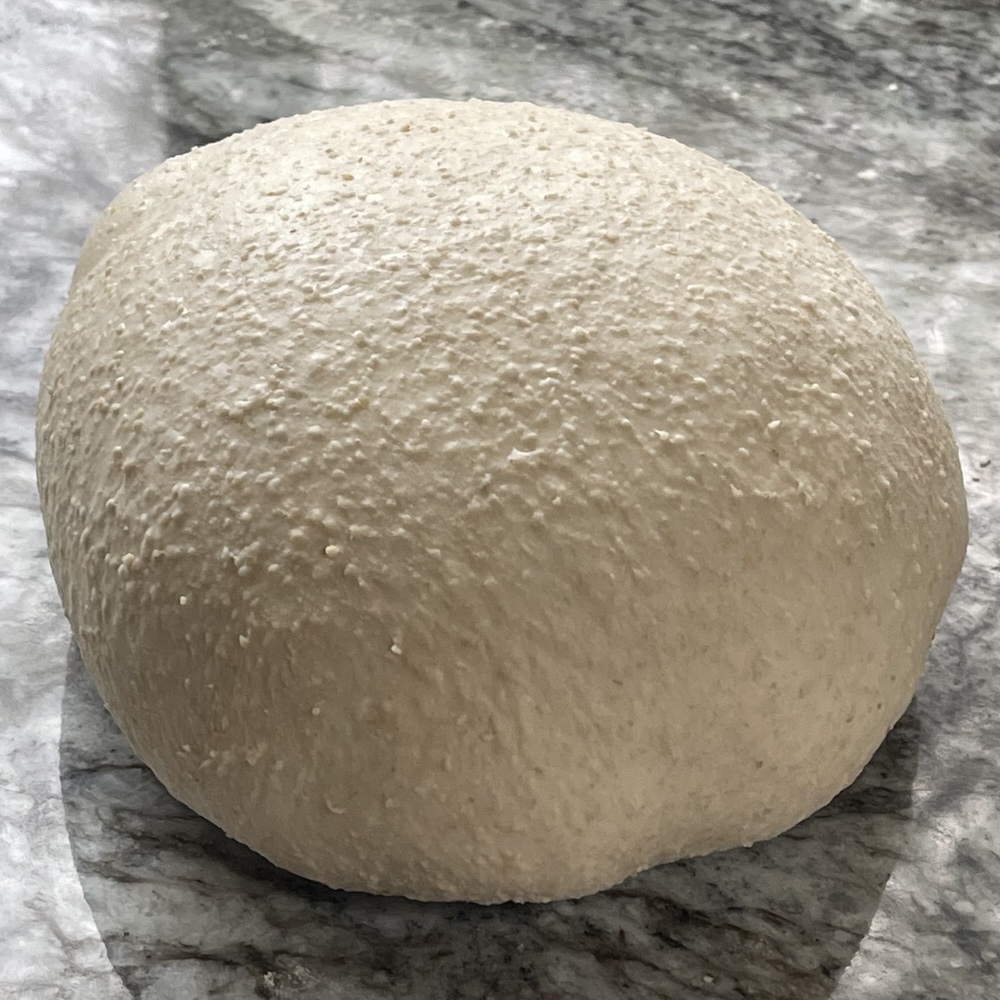
Learning how to shape sourdough means learning what to focus on as you make the best shape you can for the dough you are creating. A slightly imperfect loaf shaping that holds tension will bake better than a perfectly smooth one that spreads.
Quick visual check for Proper Dough Shape:
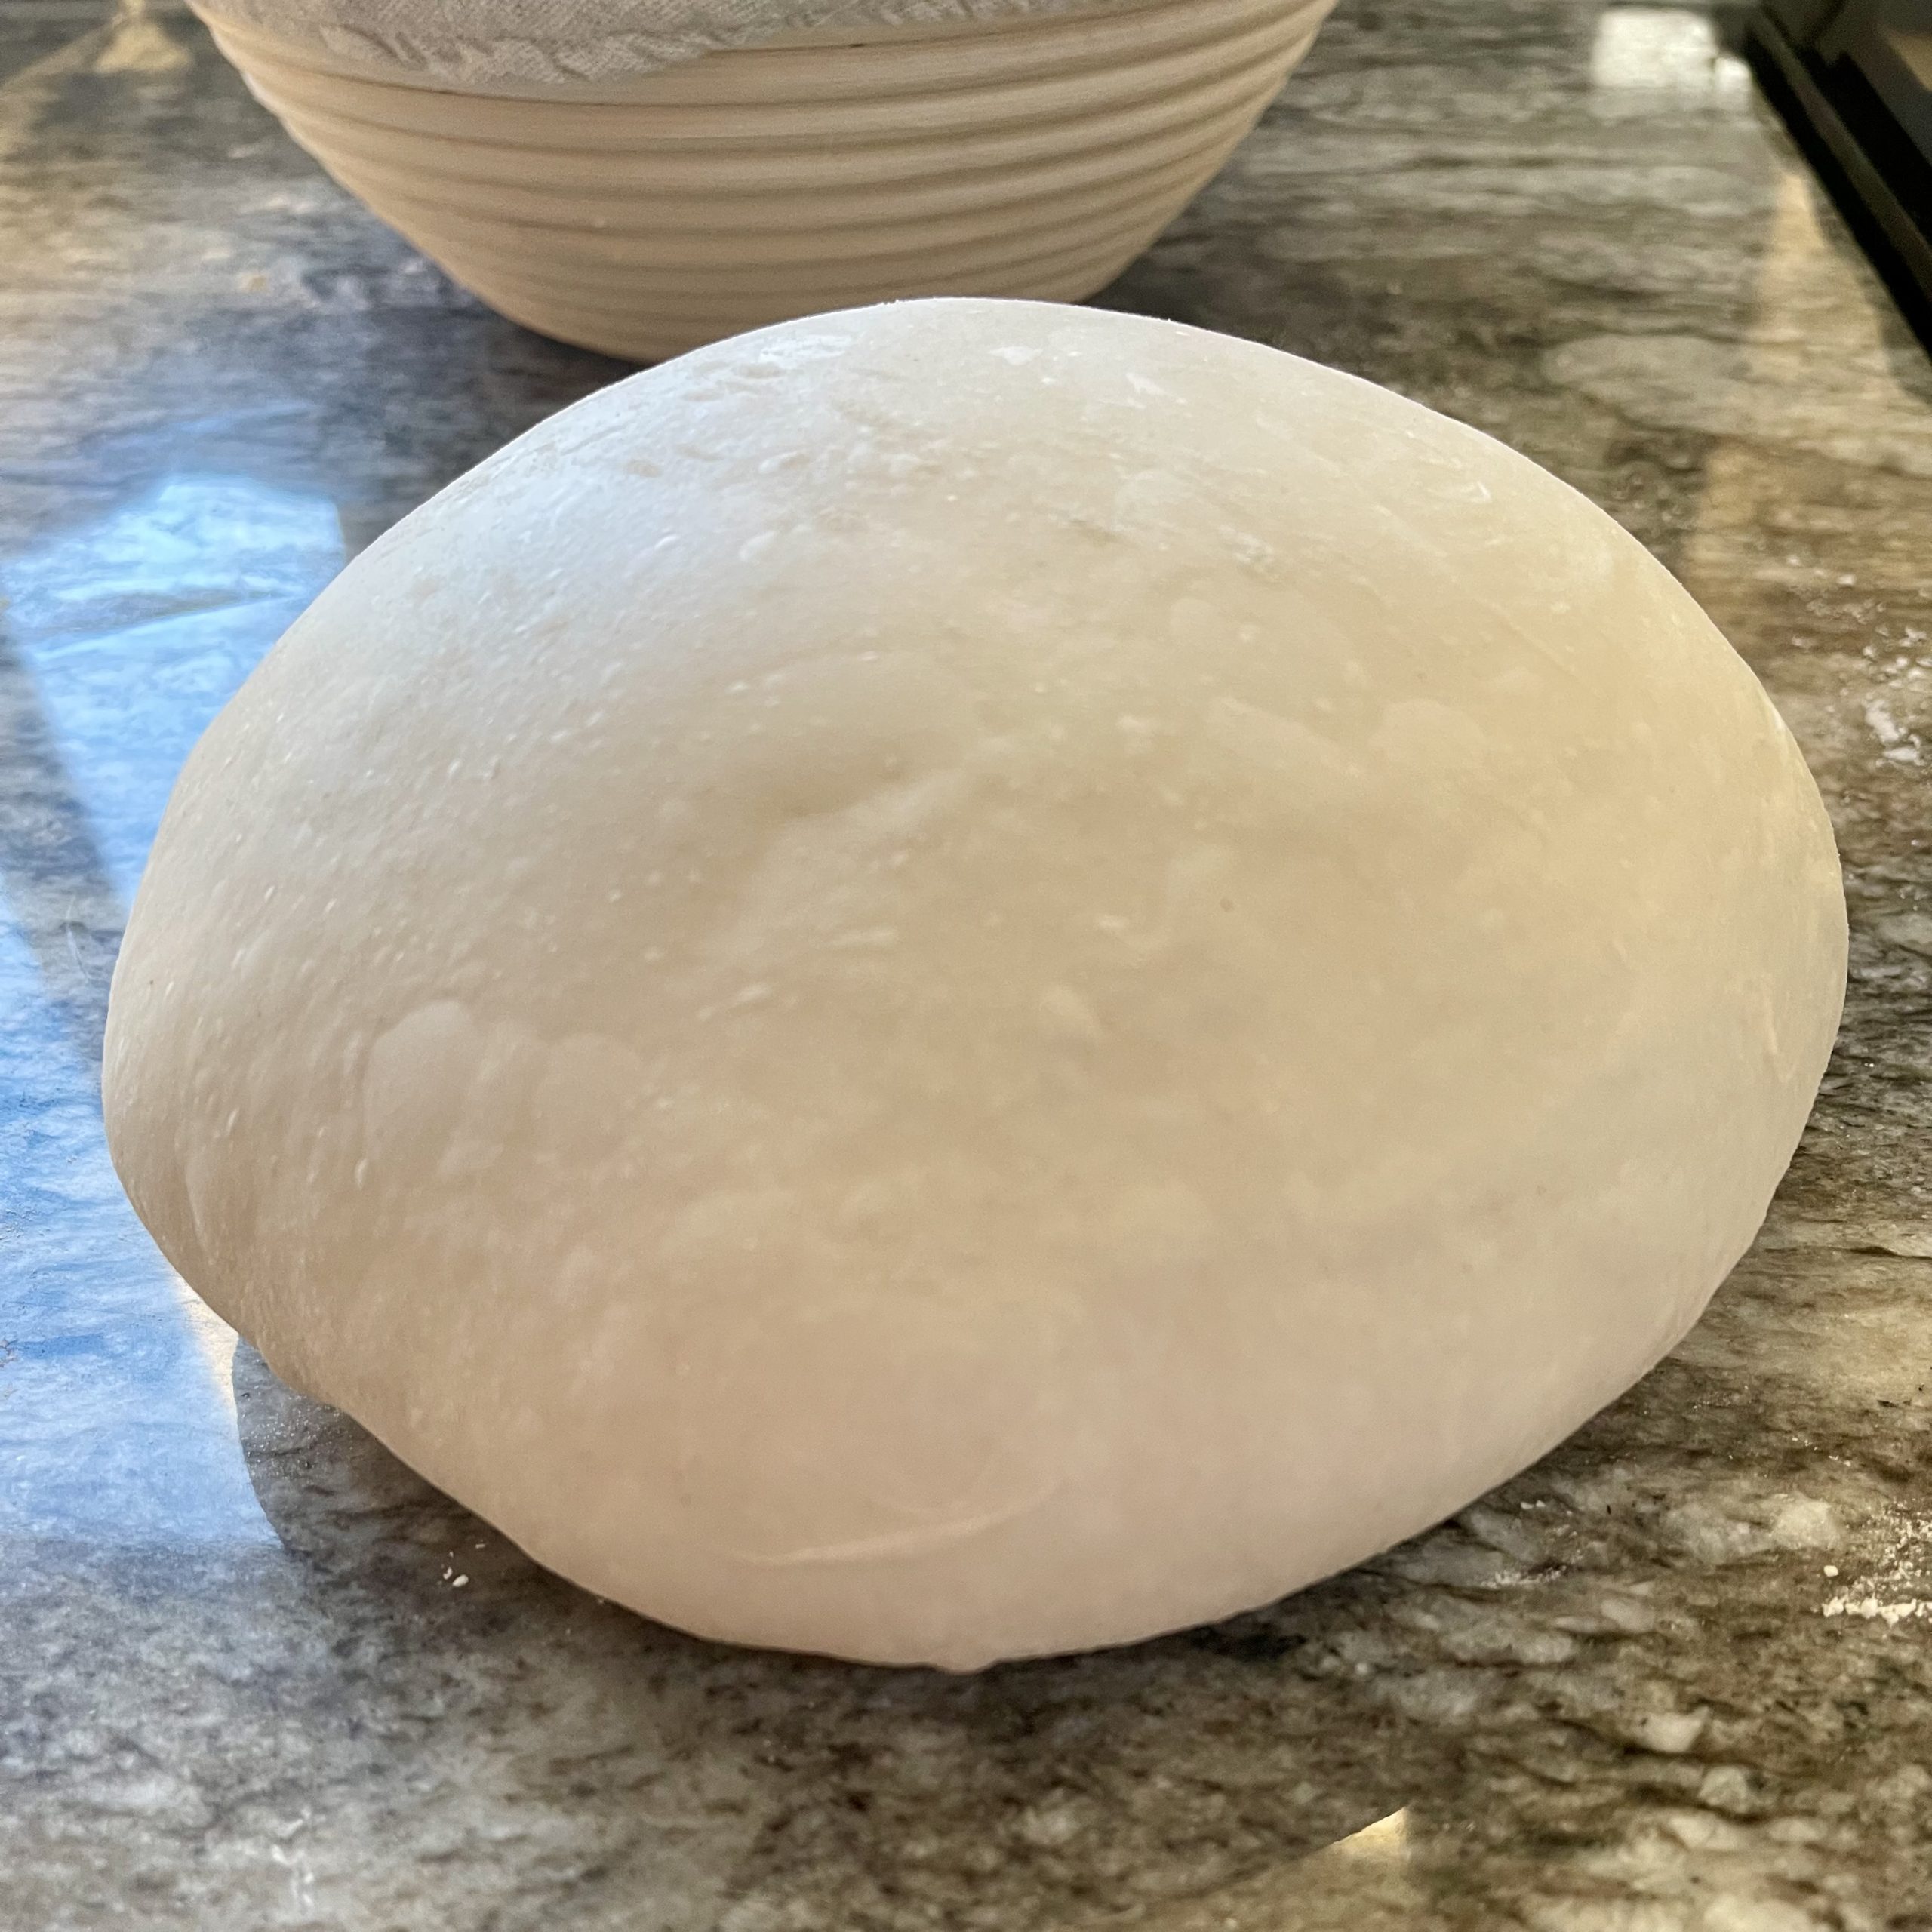
If your dough looks like it’s holding itself together like the dough pictured above, you’ve built enough tension.
If it looks like it’s relaxing outward or flattening, it likely needs a tighter shape next time.
Before Proofing Checklist
After your final shaping, check that your dough is ready for its final rise. These indicators confirm that fermentation, structure, and shaping have all come together properly before proofing.
Before final proofing, your dough should:
- Have completed bulk fermentation. This is key. Proper fermentation is necessary for good structure.
- Hold its pre-shape at bench and final shape
- Feel slightly airy, show bubbles, but still be strong while handling
- Show tension without tearing in the banneton
How To Shape Sourdough FAQ
How tight should sourdough shaping be?
Sourdough shaping should create enough tension to hold the dough’s shape without tearing the surface. The dough should feel slightly firm and supported, not overly stretched or ripping.
How do I know if I shaped my sourdough correctly?
Properly shaped sourdough will have a smooth, slightly taut surface and hold its shape without spreading. In the banneton, it should sit with rounded edges and a mostly closed seam, not flattening into the sides. If the dough looks supported and cohesive, it has enough tension.
Why does my sourdough dough tear when shaping?
Sourdough dough tears when too much tension is applied too quickly or the dough is over-handled. High hydration dough is especially prone to tearing. Use lighter pressure, make smaller folds, and allow the dough to rest if it resists shaping.
Why won’t my sourdough hold its shape after shaping?
If sourdough spreads after shaping, it usually lacks tension or is over-fermented. Weak gluten development can also cause this. Building better structure during bulk fermentation with folds, then good shaping will help the dough hold its form.
Can I reshape sourdough if I make a mistake?
Yes, sourdough can be reshaped before proofing. If the dough resists or begins to tear, let it rest for 5–10 minutes before trying again. Avoid repeated reshaping, which can weaken the dough.
Do I need to degas sourdough before shaping?
Light degassing happens naturally during shaping. The goal is to build structure and tension without collapsing the dough. For detailed crumb control techniques, see our crumb control guide.
What’s the difference between shaping a boule and a batard?
The shaping process is the same, but the direction changes. A boule is shaped evenly into a round, while a batard is shaped with length along a central axis. Both rely on building structure and surface tension.
Why is my sourdough spreading in the banneton?
Sourdough spreads in the banneton when it lacks tension or is over-fermented. Proper shaping and correct bulk fermentation timing will help the dough hold its structure during proofing.
Final Takeaway
Shaping is where your dough becomes a loaf.
Learning how to shape sourdough properly can transform loose, fermented dough into a structured form that can hold gas, expand properly, and bake with strength.
Once you learn to build tension—and adjust your shaping based on how your dough feels—you’ll see immediate improvements in oven spring, scoring, and crumb.
Where to Go Next
- How to Score Sourdough Bread
- Steam Baking Sourdough Bread
- Sourdough Crumb Structure Guide
- Why Sourdough Bread Turns Dense
- How to Proof Sourdough Bread
- What Is Dough Structure in Sourdough?
- How to Control Sourdough Crumb (Open vs Soft Sandwich Style)
- How to Get Crispy Sourdough Crust (Fix Soft, Hard, Thick, and Chewy Problems)